How to Start a Blog – Step By Step Guide For Beginners

Contents
- 1 What Is a Blog?
- 2 Choosing the Perfect Blog Name
- 3 Best Blog Hosting Platforms
- 4 Cloudways:
- 5 Install the WordPress blogging platform
- 6 Design Your Blog with a Free WordPress Theme
- 7 Essential WordPress Plugins
- 7.1 1. Yoast SEO:
- 7.2 2. Akismet Anti-Spam:
- 7.3 3. Jetpack by WordPress.com:
- 7.4 4. UpdraftPlus – Backup/Restore:
- 7.5 5. W3 Total Cache:
- 7.6 6. Wordfence Security:
- 7.7 7. Smush – Compress, Optimize, and Lazy Load Images:
- 7.8 8. Contact Form 7:
- 7.9 9. Social Warfare:
- 7.10 10. WP Super Cache:
- 7.11 11. Editorial Calendar:
- 8 How to Install a WordPress Plugin
- 9 Create the Main Pages of Your Blog: About, Contact, Privacy Policy, Disclaimer
- 10 Business Opportunity for Your Blog
- 11 How to Write Your First Blog Post
- 12 Write Your First Blog Post
- 13 Choose an SEO-Friendly Blog Post URL
- 14 Optimise the Design and Layout of Your Blog Post
- 15 Hit Publish on Your First Blog Post
- 16 Free Blog Photo Resources
- 17 Promote Your Blog
- 18 Make Money from Your Blog
- 19 FAQs
- 19.1 Q1: How do I start a blog from scratch?
- 19.2 Q2: What is the importance of choosing the right niche?
- 19.3 Q3: How can I make my blog visually appealing?
- 19.4 Q4: What are the key steps in creating engaging blog content?
- 19.5 Q5: How can I promote my blog effectively on social media?
- 19.6 Q6: What are some monetization strategies for new bloggers?
- 19.7 Q7: How often should I publish new blog posts?
- 19.8 Q8: What tools are essential for new bloggers?
- 19.9 Q9: How can I stay motivated as a new blogger?
- 19.10 Q10: How long does it take to see results as a new blogger?
What Is a Blog?
In the vast expanse of the internet, a blog emerges as a dynamic and interactive haven, where individuals or groups—affectionately known as bloggers—unleash their creativity, share their stories, and illuminate the digital landscape. Imagine it as a virtual journal, a space where ideas breathe and find their way to eager readers.
At its core, a blog is characterized by its ever-evolving nature. Unlike static websites that remain unchanged for extended periods, blogs thrive on the regular infusion of fresh content. This constant renewal not only keeps the material pertinent but also beckons visitors to return, eager to immerse themselves in the latest musings or information shared.
Stepping into the blogosphere, one is immediately struck by a distinctive writing style—casual, conversational, and often infused with the blogger’s unique personality. It is a space where personal experiences, opinions, and insights take center stage, creating a relatable and human connection with the audience. This informality is a cornerstone of the blog’s charm, making it an inviting platform for both creators and readers.
Integral to the blog experience is the interactive element—the comments section. Each post serves as a catalyst for a virtual conversation, where readers can engage with the content, express their thoughts, and pose questions. This space not only fosters a sense of community but also transforms the act of reading into a collaborative and enriching experience.
To navigate the diverse array of content, blogs employ organizational tools such as categories and tags. Categories group related posts, offering a structured overview, while tags provide a granular approach, helping readers pinpoint specific topics of interest. This system turns the blog into a well-organized library, where information is readily accessible and exploration is encouraged.
Moreover, a blog serves as a time capsule, storing past posts in archives. This feature ensures that readers can delve into the rich history of content, exploring older posts and discovering valuable information from the past. It becomes not just a source of the present but a reservoir of ideas spanning across time.
In the realm of blogs, convenience is paramount. With RSS feeds (Really Simple Syndication), readers can effortlessly subscribe to their favorite blogs. This means automatic updates delivered to their virtual doorstep whenever new content is published—a seamless way to stay in the loop without actively seeking updates.
Beyond words, a blog is a multimedia experience. Bloggers enhance their storytelling with captivating images, engaging videos, and informative infographics. This visual diversity transforms the reading experience, making it dynamic and enjoyable.
In essence, a blog is your canvas—a place to paint your thoughts, share your passions, and connect with a global audience. So, if you’re contemplating a foray into the digital realm, consider this your invitation to start a blog and embark on a journey of expression, community, and endless possibilities.
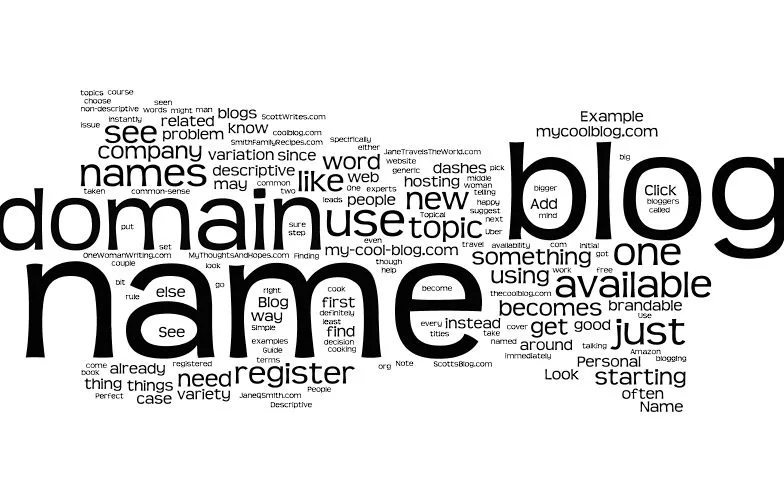
Choosing the Perfect Blog Name
Embarking on the exciting journey of starting a blog begins with a crucial step – picking a name that encapsulates your essence and resonates with your audience. Your blog’s name is not merely an address on the internet; it’s the beacon that guides readers to your virtual realm. Here’s a guide to help you navigate the process of selecting the perfect moniker for your digital venture.
1. Reflect Your Content:
Consider your blog’s niche and the topics you plan to cover. Your blog name should offer a glimpse into the content you create. If you focus on travel, wellness, or technology, integrating relevant keywords into your name can convey your blog’s theme at a glance.
2. Be Memorable:
A memorable blog name is a powerful asset. Aim for something that is easy to spell, pronounce, and remember. Avoid overly complex or obscure names that might confuse potential visitors. Clarity and simplicity go a long way in making your blog easy to find and share.
3. Check Availability:
Before falling in love with a name, ensure that the domain is available for registration. Your blog’s domain is its online address, so securing a matching domain name is essential. Use domain registration platforms to check the availability of your desired name and variations.
4. Unique Identity:
Stand out in the vast digital landscape by choosing a name that reflects your unique perspective. A distinctive blog name not only helps in branding but also sets the tone for your content. Avoid names that closely resemble existing popular blogs to establish your individuality.
5. Consider Future Growth:
Select a name that allows for future growth and evolution. While your blog may focus on specific topics initially, your interests or niche may expand over time. A versatile blog name accommodates these changes without limiting your potential.
6. Research and Avoid Copyright Issues:
Before finalizing your blog name, conduct a thorough search to ensure it’s not already in use, especially within your blogging niche. This minimizes the risk of copyright infringement issues. A unique and legally sound name provides a solid foundation for your blogging endeavors.
7. Connect Emotionally:
If possible, infuse a bit of personality or emotion into your blog name. An emotionally resonant name can create a stronger connection with your audience. Whether it’s humor, inspiration, or a sense of belonging, evoke feelings that align with your blog’s tone.
Remember, your blog’s name is a pivotal part of your online identity. Take the time to brainstorm, explore various options, and choose a name that not only captures the essence of your content but also leaves a lasting impression on your readers. With the right name, your blog becomes more than a website; it becomes a brand, a destination, and a reflection of your passion.
Best Blog Hosting Platforms
Embarking on your blogging journey involves a pivotal decision – choosing the right blog hosting platform. This choice significantly impacts your blog’s performance, speed, and overall user experience. Let’s delve into the intricacies of the best blog hosting platforms to help you make an informed decision.
Bluehost:
Bluehost stands out as a reliable and user-friendly choice, particularly well-suited for bloggers entering the digital sphere. Let’s explore the features, pricing, and benefits that make Bluehost a preferred option for many in the blogging community.
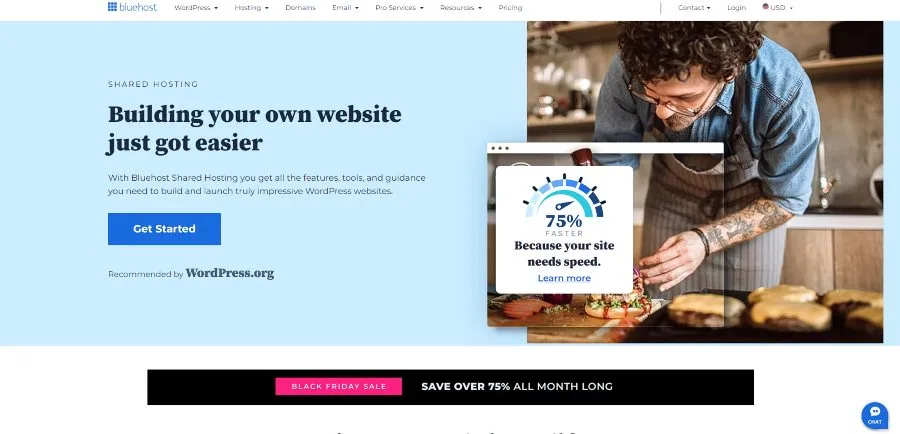
1. User-Friendly Interface:
Bluehost is renowned for its intuitive and user-friendly interface. Navigating through the platform is straightforward, making it an ideal choice for beginners who may be setting up their first blog. The one-click WordPress installation further simplifies the process, allowing users to get their blogs up and running quickly and efficiently.
2. 24/7 Customer Support:
One of the key strengths of Bluehost is its commitment to customer support. The platform offers 24/7 customer assistance, ensuring that users can seek help or resolve issues at any time. This level of support is particularly valuable for bloggers who may encounter technical challenges or have questions about optimizing their websites.
3. Performance and Reliability:
Bluehost consistently delivers reliable performance. The platform boasts excellent uptime, minimizing the risk of website downtime and ensuring that your blog is accessible to your audience consistently. The reliability of Bluehost is a critical factor for bloggers who rely on a stable online presence to connect with their readers.
4. Affordable Shared Hosting Plans:
For those starting their blogging journey on a budget, Bluehost’s shared hosting plans are a compelling option. The Basic plan, often recommended for beginners, includes essential features such as a free domain name for the first year, 50 GB of website space, and unmetered bandwidth. As your blog grows, you can easily upgrade to more advanced plans like Plus or Choice Plus, offering additional resources and features.
5. WordPress Integration:
Bluehost is officially recommended by WordPress, making it a seamless choice for bloggers utilizing the WordPress platform. The one-click installation process simplifies the setup, allowing users to focus on creating content rather than dealing with complex technicalities. Bluehost’s compatibility with WordPress plugins and themes enhances the customization options for bloggers seeking a personalized touch.
6. Security Features:
Security is a top priority for Bluehost. The platform provides free SSL certificates, enhancing the security of your blog by encrypting data transmission between your website and visitors. This is crucial for building trust with your audience and improving your website’s search engine ranking.
7. Transparent Pricing:
Bluehost’s pricing structure is transparent and competitive. While prices may vary based on promotions and plans, the Basic shared hosting plan typically starts at an affordable monthly rate. Additionally, Bluehost often provides promotional discounts for the initial subscription period, making it even more budget-friendly for new bloggers.
Hostinger:
For those seeking an affordable yet feature-rich hosting solution, Hostinger emerges as a compelling choice, particularly well-suited for bloggers entering the online domain. Here, we delve into the features, pricing, and advantages that position Hostinger as an attractive option in the hosting landscape.
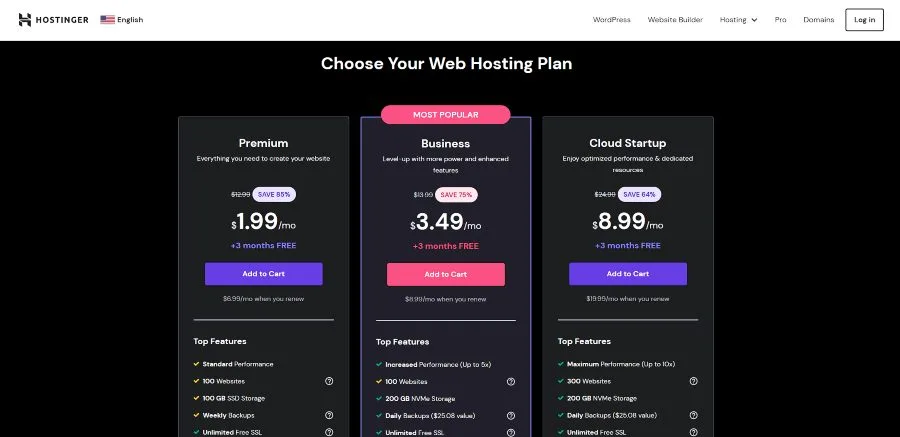
1. Cost-Effective Hosting Plans:
Hostinger is recognized for its budget-friendly hosting plans, making it an ideal option for bloggers mindful of their expenses. The platform offers shared hosting, cloud hosting, and WordPress-specific plans, catering to a diverse range of needs. The affordability of Hostinger plans, coupled with their robust features, makes it an attractive choice for those starting their blogging journey on a budget.
2. Impressive Loading Speeds:
Hostinger places a strong emphasis on performance, delivering impressive loading speeds for websites hosted on their platform. This is crucial for bloggers, as faster loading times contribute to a positive user experience and can positively impact search engine rankings. Hostinger’s commitment to speed enhances the overall performance of blogs hosted on their platform.
3. User-Friendly Interface:
Navigating through Hostinger’s interface is intuitive and user-friendly. The platform simplifies the setup process, allowing bloggers, especially beginners, to easily configure their websites. With a straightforward control panel and clear navigation, Hostinger minimizes the learning curve associated with managing a website.
4. Comprehensive Features:
Hostinger’s hosting plans come with a range of features, even in their entry-level plans. From a free domain name to sufficient storage space and bandwidth, Hostinger ensures that bloggers have the necessary resources to establish and grow their online presence. As your blog expands, you can explore advanced plans for additional resources.
5. WordPress Optimization:
Hostinger is optimized for WordPress, making it a suitable choice for bloggers leveraging this popular content management system. The platform supports easy installation and integration with WordPress, providing bloggers with a seamless experience. This compatibility enhances customization options, allowing bloggers to personalize their websites according to their preferences.
6. Security Measures:
Security is a priority for Hostinger, evident in the array of security measures incorporated into their hosting plans. Free SSL certificates are included, encrypting data transmission and enhancing the overall security of hosted websites. These security features contribute to a secure online environment for both bloggers and their audiences.
7. 24/7 Customer Support:
Hostinger offers 24/7 customer support, ensuring assistance is readily available whenever bloggers encounter challenges or have inquiries. This commitment to customer service is crucial for bloggers who may need timely support to address technical issues or seek guidance on optimizing their websites.
8. Transparent and Competitive Pricing:
Hostinger maintains a transparent pricing structure, displaying the costs clearly for each hosting plan. The affordability of their plans, combined with occasional promotional discounts, makes Hostinger an attractive option for those mindful of their budget.
Hostinger emerges as an empowering hosting platform for bloggers, offering a winning combination of affordability, performance, and user-friendly features. Its commitment to delivering value for money makes it an appealing choice for both budget-conscious beginners and experienced bloggers seeking a reliable hosting solution for their digital ventures.
Cloudways:
Cloudways stands as a distinctive hosting solution, leveraging the power of cloud infrastructure to provide bloggers with a flexible, scalable, and performance-driven hosting experience. Below, we explore the features, advantages, and unique characteristics that position Cloudways as a noteworthy choice in the dynamic world of web hosting.

1. Cloud-Powered Infrastructure:
At the core of Cloudways is its utilization of cloud infrastructure. Unlike traditional hosting, Cloudways harnesses the power of top cloud providers such as Amazon Web Services (AWS), Google Cloud Platform (GCP), and DigitalOcean. This cloud-powered approach ensures optimal performance, scalability, and reliability for hosted websites, meeting the dynamic needs of bloggers.
2. Choice of Cloud Providers:
Cloudways allows users to choose from multiple cloud providers, providing flexibility to tailor hosting solutions according to specific preferences. This flexibility is advantageous for bloggers who may have varying requirements based on factors such as budget, geographic server locations, or specific features offered by different cloud providers.
3. Scalability for Growing Blogs:
One of the standout features of Cloudways is its scalability. Bloggers can easily scale their hosting resources up or down based on their website’s demands. This is particularly valuable for growing blogs experiencing fluctuations in traffic, ensuring optimal performance during peak times without the need for complex server management.
4. Performance Optimization:
Cloudways prioritizes performance optimization, offering features like built-in caching, content delivery network (CDN) integration, and server-level performance tweaks. These elements contribute to faster loading times, improved user experience, and enhanced SEO rankings, crucial considerations for bloggers seeking to maximize their online impact.
5. Managed Hosting with Simplicity:
Cloudways distinguishes itself with a managed hosting approach that combines the benefits of cloud infrastructure with user-friendly management. Users can enjoy the advantages of cloud hosting without dealing with the complexities of server setup and maintenance. The intuitive control panel streamlines tasks, making it accessible for bloggers with varying levels of technical expertise.
6. Security Measures:
Security is a paramount concern for Cloudways. The platform incorporates robust security measures, including regular security patches, dedicated firewalls, and automated backups. These features contribute to a secure hosting environment, safeguarding bloggers’ data and ensuring the integrity of their websites.
7. Pay-As-You-Go Pricing:
Cloudways operates on a pay-as-you-go pricing model, providing cost flexibility for bloggers. Users pay only for the resources they consume, making it a cost-effective choice, especially for those who wish to align their hosting expenses with their actual usage.
8. Expert Customer Support:
Cloudways is known for its responsive and knowledgeable customer support. The platform offers 24/7 support through various channels, ensuring that bloggers receive timely assistance for any technical issues or inquiries they may encounter during their hosting journey.
In conclusion, Cloudways emerges as a powerful hosting solution that combines the benefits of cloud infrastructure with simplicity, scalability, and strong performance optimization. Whether you’re a seasoned blogger seeking advanced features or a newcomer looking for a user-friendly cloud hosting experience, Cloudways offers a compelling blend of cutting-edge technology and ease of use for your digital endeavors.
Install the WordPress blogging platform
Once you’ve chosen a reliable hosting platform, the next crucial step is installing the WordPress blogging platform. WordPress stands out as a versatile and user-friendly content management system, making it the preferred choice for countless bloggers. Let’s explore the process of installing WordPress and the key steps to set up your blog efficiently.
1. Access Your Hosting Control Panel:
After signing up with your chosen hosting provider, access the hosting control panel. Most hosting platforms, including popular ones like Bluehost, Hostinger, and SiteGround, offer a user-friendly dashboard. Search for the section that pertains to website management or installations.
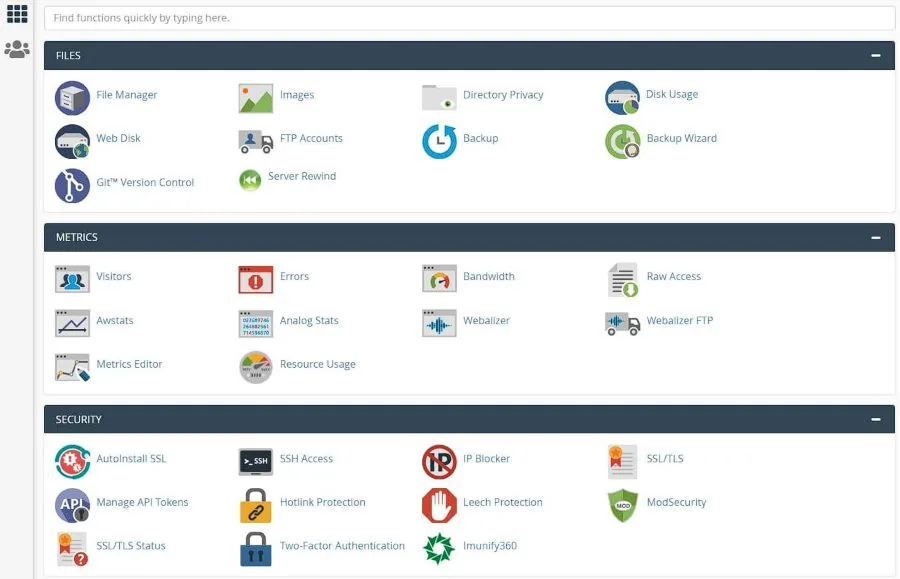
2. Locate the WordPress Installer:
Within the hosting control panel, you’ll find an option to install applications or scripts. Locate the WordPress installer, which is often available as a one-click installation tool. This simplifies the process significantly, even for those with limited technical expertise.
3. Configure Your WordPress Installation:
Once you’ve initiated the WordPress installer, you’ll be prompted to configure your installation. This includes specifying details such as your blog’s name, tagline, and the administrative username and password. Take note of these credentials as they will be essential for managing your WordPress site.
4. Choose Your Domain:
Select the domain under which you want to install WordPress. If you have multiple domains associated with your hosting account, choose the one where you want your blog to reside. If you’ve registered a new domain, ensure it’s properly linked to your hosting account.
5. Select Installation Preferences:
Some hosting providers offer additional options during the installation process. You might be asked whether to enable or disable features like automatic backups, SSL certificates, or specific plugins. Review these options based on your preferences and the needs of your blog.
6. Complete the Installation:
Once you’ve configured the settings, initiate the installation process. The installer will take care of copying the necessary files and setting up the WordPress database. This process usually takes a few minutes. Once completed, you’ll receive a confirmation, and you can proceed to access the WordPress dashboard.
Design Your Blog with a Free WordPress Theme
Once you’ve successfully installed WordPress, the next step in shaping your blog’s identity is to choose and implement a free WordPress theme. Your blog’s theme plays a pivotal role in defining its visual appeal and user experience. Let’s explore the process of selecting and applying a free WordPress theme to give your blog a personalized and professional look.
1. Navigate to the WordPress Dashboard:
Access the WordPress dashboard by logging in to your WordPress admin area. Once logged in, you’ll be directed to the dashboard, your central hub for managing various aspects of your blog.
2. Visit the “Appearance” Section:
In the left-hand menu of the dashboard, locate and click on the “Appearance” tab. This section houses all the tools and settings related to the visual aspects of your blog, including themes.
3. Choose “Themes” or “Theme Manager”:
Depending on your WordPress version or the theme options provided by your hosting platform, you may see either “Themes” or “Theme Manager.” Click on the appropriate option to access the theme management area.
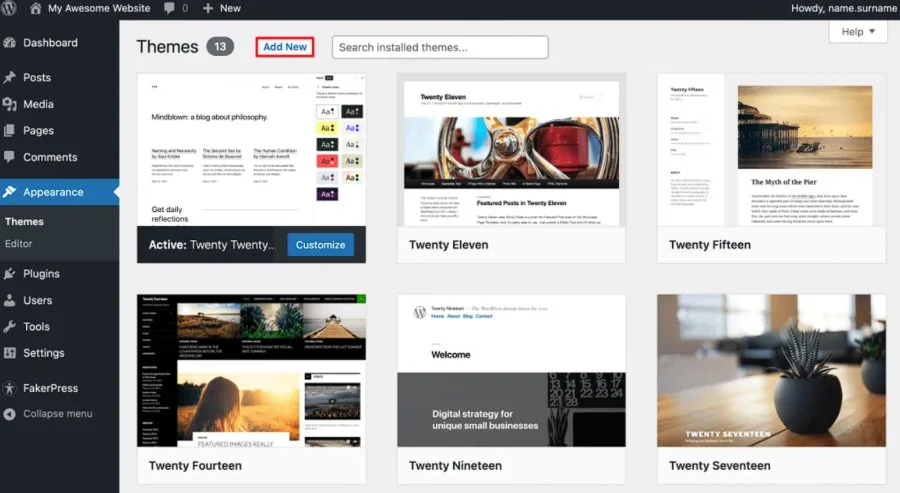
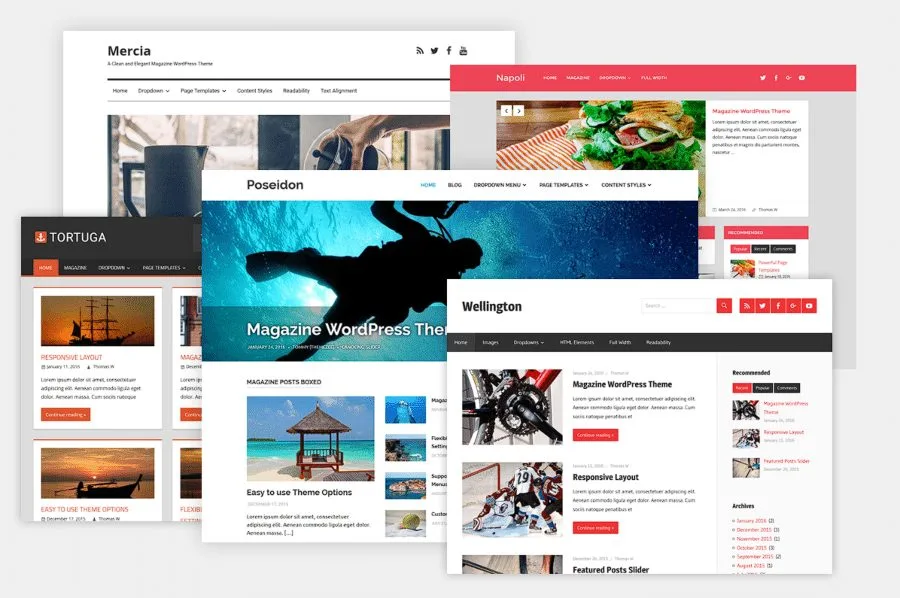
4. Explore Free Themes:
Within the theme management area, you’ll find a variety of free WordPress themes. WordPress offers an extensive collection, and you can preview each theme to see how it would look on your blog. Explore different categories and styles that align with your blog’s content and personality.
5. Preview Themes:
Before committing to a theme, take advantage of the “Preview” feature. This allows you to see how the theme will appear on your blog without activating it. Pay attention to layout, color schemes, and overall design to ensure it complements your blog’s identity.
6. Install Your Chosen Theme:
Once you’ve found the perfect theme, click the “Install” button. WordPress will download and install the theme on your site. After installation, you’ll have the option to activate the theme, making it the new face of your blog.
7. Customize Your Theme:
Most WordPress themes offer customization options to tailor the appearance according to your preferences. Explore the “Customize” section within the “Appearance” menu to adjust settings such as colors, fonts, header images, and more. This step allows you to add a personal touch to your chosen theme.
8. Ensure Responsiveness:
Choose a theme that is responsive, meaning it adapts to different screen sizes & devices. This ensures that your blog looks appealing and functions well whether viewed on a desktop, tablet, or smartphone.
By selecting and customizing a free WordPress theme, you can transform the visual identity of your blog, creating an inviting and professional online space for your readers. The process is user-friendly and allows for creative expression, ensuring your blog’s design aligns seamlessly with its content and resonates with your audience.
Why Blog Design is so Important
When you’re just starting your blog, how it looks is super important. It’s not just about looking pretty; it affects how people feel about your blog and what they think of your content. Here’s why the design of your blog is a big deal:
1. First Impressions Count:
Think of your blog’s design as the first hello. If it looks good and is easy to navigate, people are more likely to stick around and read your stuff. A positive first impression can turn a random visitor into a regular reader.
2. Shows Your Style:
Your blog’s design is like your blog’s outfit. It shows off your style and personality. Using the same colors, fonts, and images consistently helps build a brand for your blog that your readers can recognize.
3. Makes Reading Easy:
A well-designed blog makes it easy for people to read your articles. Clear writing, good spacing, and a nice layout mean readers won’t get tired of reading. Making it easy for people to read keeps them coming back for more.
4. Looks Professional:
If your blog looks well-kept and professional, it makes you look trustworthy. People are more likely to believe what you say and trust your advice if your blog looks polished and put together.
5. Changes with the Times:
The way blogs look changes over time. Keeping your blog design updated shows that you’re keeping up with the times. It keeps your blog looking fresh and modern.
6. Makes People Share:
When your blog looks good, people want to share it with their friends. They’re more likely to post your articles on social media if your blog looks appealing. Adding easy-to-use buttons for sharing helps with this.
7. Helps People Find You:
Search engines like Google notice well-designed blogs. If your blog is set up right with good headings, tags, and images, it can help your blog show up in search results. This means more people can find your blog.
8. Keeps People Around:
An easy-to-use and good-looking blog keeps people on your site. If it’s hard to use or doesn’t look nice, people might leave and not come back. Keeping people around helps you grow your audience.
So, when you’re starting your blog, remember that how it looks is a big deal. It’s not just about being pretty; it’s about making people want to read what you have to say.
Essential WordPress Plugins
After setting up your blog and crafting its visual identity, the next step is to enhance its functionality with essential WordPress plugins. These plugins add valuable features, improve user experience, and optimize your blog for various tasks. Here’s a guide to the must-have WordPress plugins you should install on your new blog today.
1. Yoast SEO:
Yoast SEO is a powerhouse for optimizing your blog’s content for search engines. This plugin provides a user-friendly interface within your WordPress editor, offering real-time suggestions to improve your articles’ SEO. It guides you on crafting compelling meta titles and descriptions, optimizing your content for specific keywords, and enhancing overall readability. By leveraging Yoast SEO, you not only increase the chances of your blog ranking higher on search engine results but also gain valuable insights into how to enhance the quality and visibility of your content.
2. Akismet Anti-Spam:
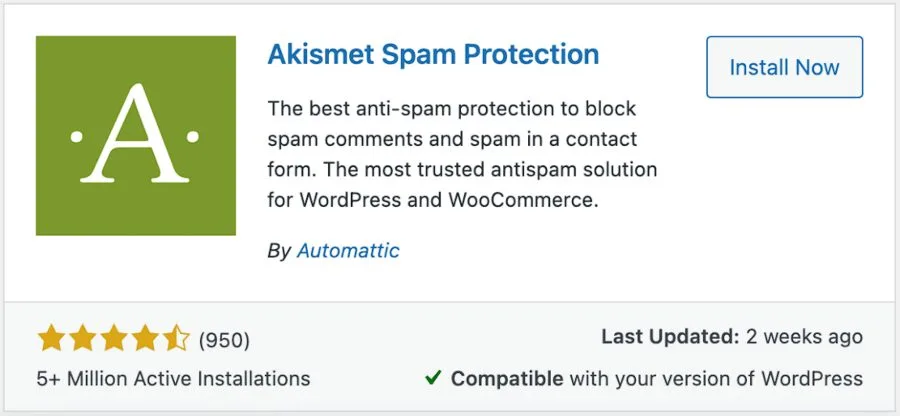
Akismet Anti-Spam is your first line of defense against spam comments. This plugin automatically filters and detects potentially harmful or irrelevant comments, preventing them from cluttering your comment section. Akismet uses an advanced algorithm to analyze and assess comments, sparing you the time and effort required to manually moderate each one. By maintaining a clean and spam-free comment section, you create a more engaging and trustworthy environment for your readers.
3. Jetpack by WordPress.com:
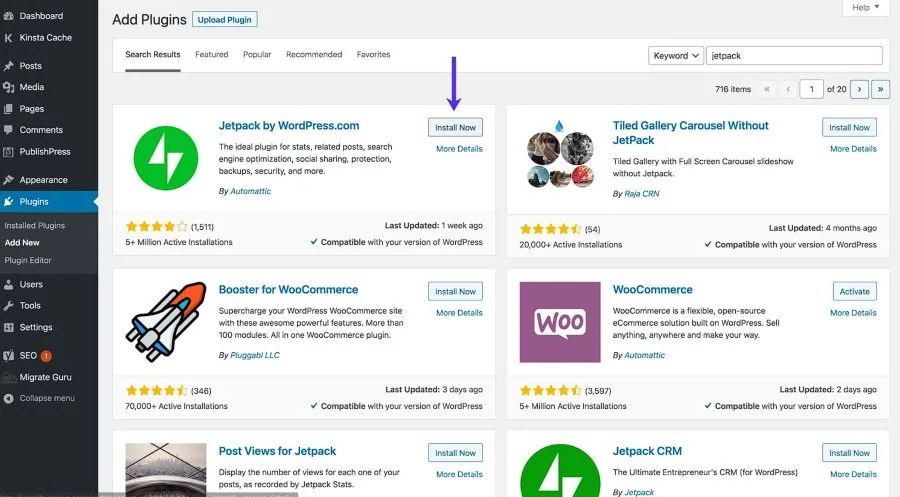
Jetpack is a versatile plugin that consolidates various features to supercharge your blog’s performance. From website analytics and security tools to social media integration and performance optimization, Jetpack acts as an all-in-one toolkit. It provides valuable insights into your website’s traffic, protects against potential threats, connects your blog seamlessly with social media platforms, and enhances overall user experience. Jetpack’s comprehensive range of features makes it an essential plugin for bloggers looking to streamline their site management.
4. UpdraftPlus – Backup/Restore:
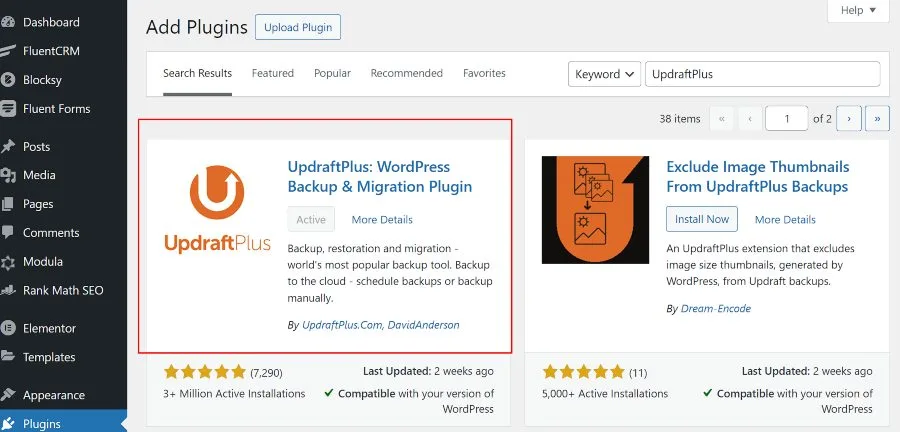
Ensuring the safety of your blog’s content is paramount, and UpdraftPlus simplifies the backup process. This plugin allows you to schedule regular backups of your website, including databases and files. In case of unforeseen issues, such as server crashes or data loss, UpdraftPlus makes restoration a breeze. With various storage options, including cloud services like Dropbox and Google Drive, UpdraftPlus ensures that your valuable content is securely backed up, providing peace of mind for bloggers concerned about data protection.
5. W3 Total Cache:
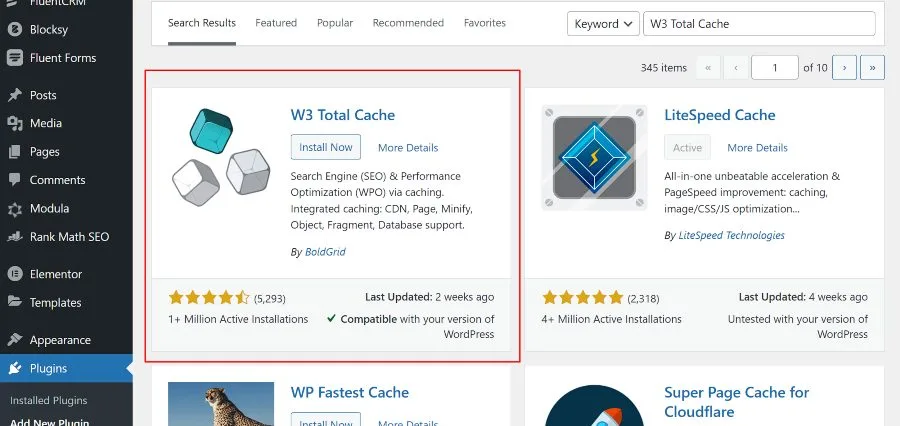
W3 Total Cache is a performance optimization plugin designed to enhance your blog’s loading speed. By leveraging features like page caching, database caching, and minification of CSS and JavaScript files, W3 Total Cache reduces server load and improves the overall user experience. Faster-loading pages not only contribute to a better user experience but also positively impact search engine rankings. W3 Total Cache is an invaluable tool for bloggers looking to boost their site’s performance and responsiveness.
6. Wordfence Security:
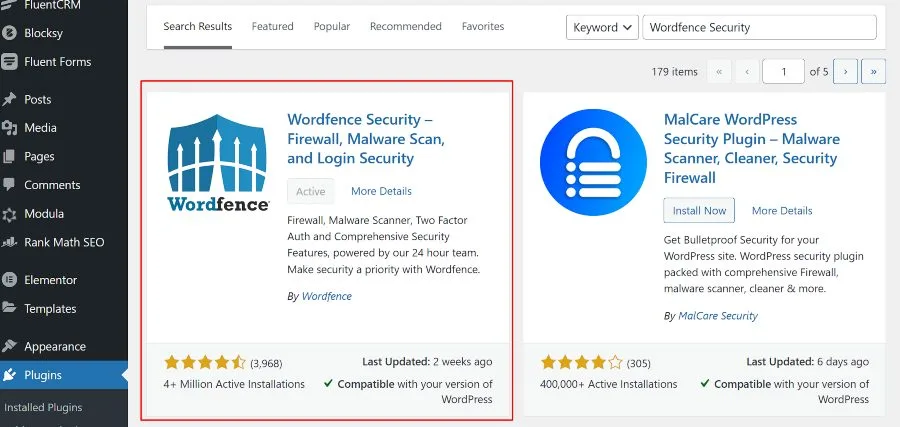
Security is a top priority for any blog, and Wordfence Security is a robust solution for safeguarding your site. This plugin offers a firewall to block malicious traffic, malware scanning to detect potential threats, and login attempt monitoring to prevent unauthorized access. Wordfence Security keeps your blog protected from various security risks, providing real-time alerts and detailed reports to keep you informed about the security status of your website.
7. Smush – Compress, Optimize, and Lazy Load Images:
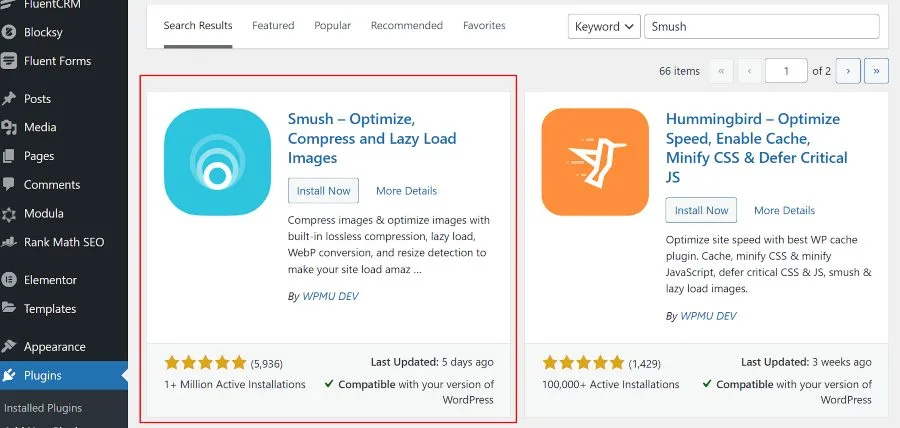
Smush is a dedicated plugin for optimizing images on your blog. By automatically compressing and resizing images, Smush reduces the file size without compromising quality. This not only improves loading times but also contributes to overall site performance. The lazy loading feature ensures that images are only loaded when they come into the viewer’s viewport, further optimizing page speed. Smush is a must-have for bloggers who want to showcase high-quality images without sacrificing site performance.
8. Contact Form 7:
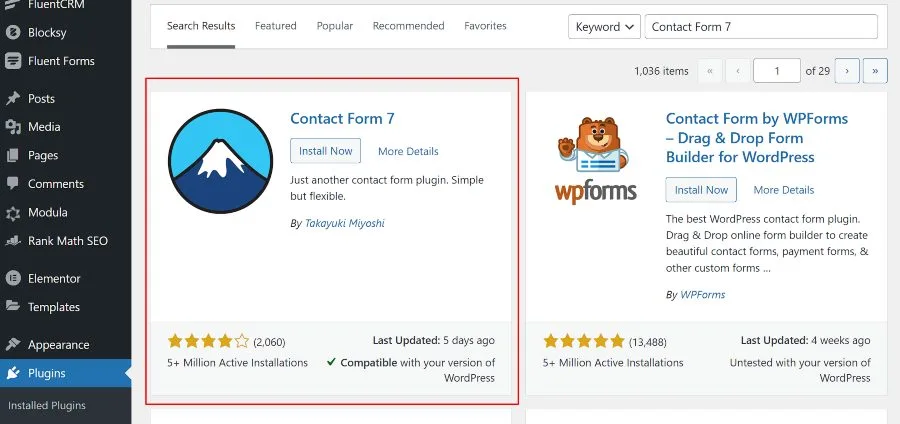
Contact Form 7 simplifies the process of creating and managing contact forms on your blog. This user-friendly plugin allows you to design custom forms and embed them seamlessly into your content or dedicated contact pages. Whether you need a simple contact form or a more elaborate survey, Contact Form 7 provides flexibility in form creation. By facilitating communication with your audience, this plugin encourages reader engagement and provides a straightforward way for visitors to reach out to you.
9. Social Warfare:
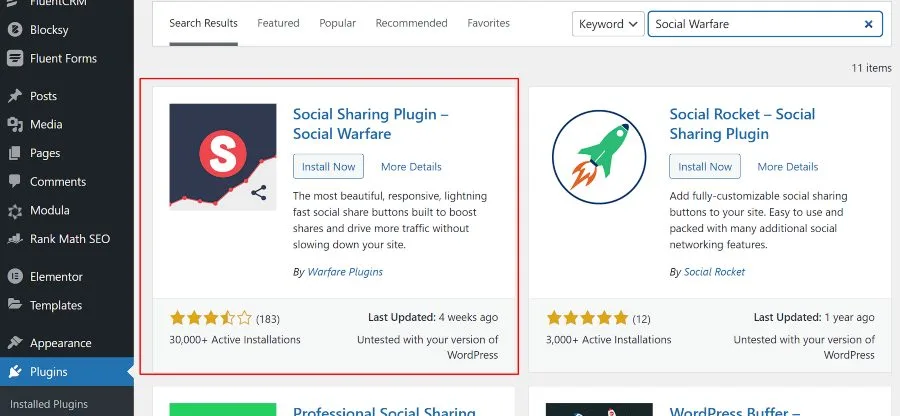
Social Warfare is a social sharing plugin designed to enhance your blog’s visibility on social media platforms. It adds attractive and customizable social share buttons to your content, encouraging readers to easily share your articles. The plugin provides options for specifying which images and descriptions are shared on different platforms, ensuring your content looks appealing when shared on social media. Social Warfare is a valuable tool for bloggers seeking to amplify their reach and promote social sharing of their content.
10. WP Super Cache:
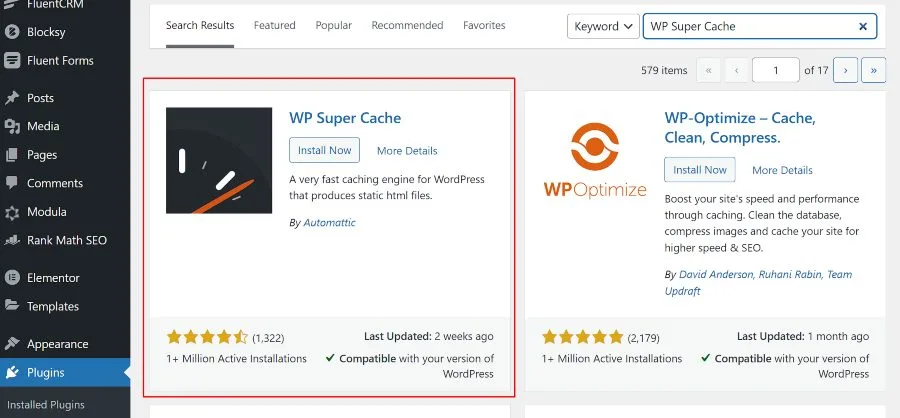
WP Super Cache is a caching plugin that improves your blog’s loading speed and performance. By generating static HTML files, WP Super Cache reduces server load and accelerates page loading times. This results in a smoother user experience and contributes to better SEO rankings. With options for manual and automatic cache clearing, WP Super Cache ensures that your blog’s content is delivered to users quickly and efficiently.
11. Editorial Calendar:
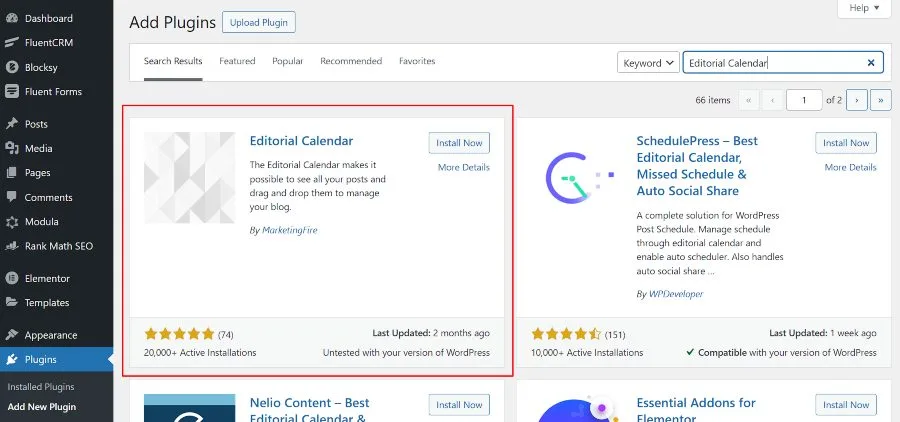
Editorial Calendar simplifies the management of your blog’s content schedule. This plugin provides a visual overview of your scheduled articles, making it easy to plan and organize your content. With drag-and-drop functionality, you can easily reschedule posts, ensuring a consistent and well-managed publishing calendar. Editorial Calendar is a valuable tool for bloggers looking to stay organized and maintain a structured approach to content creation.
By incorporating these essential WordPress plugins, you enhance your blog’s functionality, security, and overall performance. Each plugin serves a specific purpose, contributing to a well-rounded and optimized blogging experience.
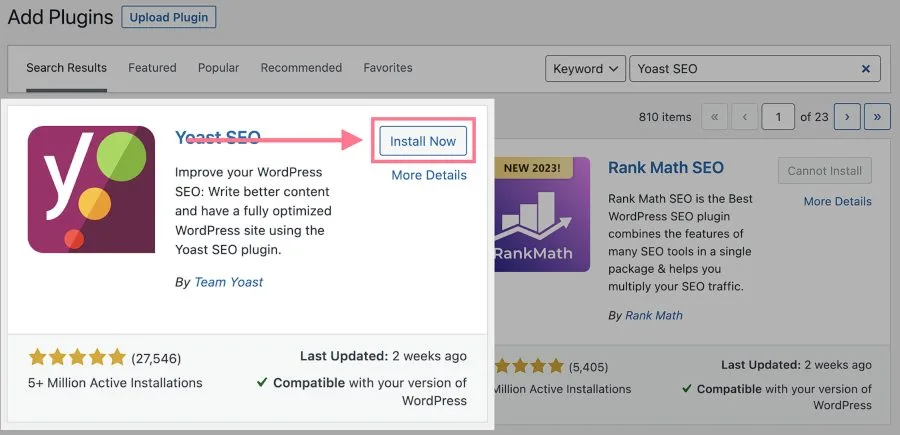
How to Install a WordPress Plugin
Adding plugins to your WordPress site is a straightforward process that can significantly enhance your blog’s functionality. Whether you’re looking to boost SEO, improve security, or add new features, installing a WordPress plugin is the key. Here’s a step-by-step guide on how to install a WordPress plugin effortlessly.
1. Access Your WordPress Dashboard:
Begin by logging into your WordPress dashboard. This is the admin area where you manage your blog’s content, settings, and appearance. If you’ve just set up your WordPress site, the dashboard is the first page you see after logging in.
2. Navigate to the “Plugins” Section:
In the left-hand menu of the dashboard, locate and click on the “Plugins” tab. This section is where you can manage all the plugins installed on your site.
3. Click on “Add New”:
Once you’re in the Plugins section, you’ll see an “Add New” button at the top. Click on it to access the plugin installation page.
4. Search for Your Desired Plugin:
In the search bar on the Add New Plugins page, enter the name or functionality of the plugin you’re looking for. WordPress will show a list of all relevant plugins based on what you search.
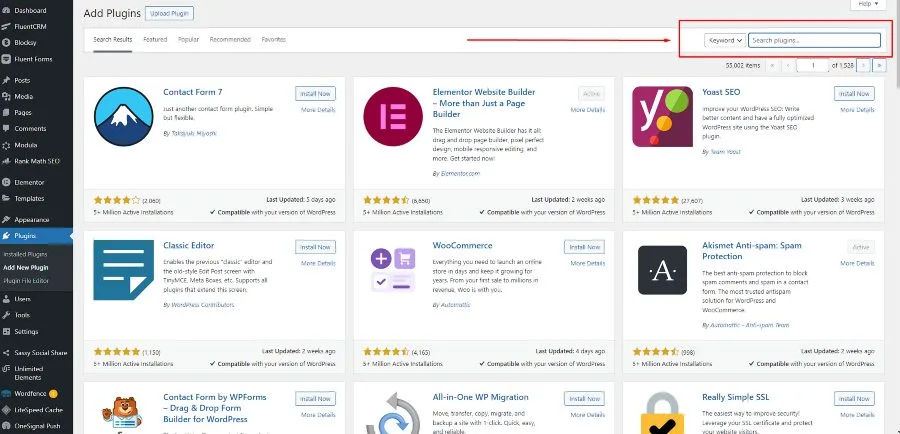
5. Choose and Install a Plugin:
Browse through the list of plugins and find the one that fits your needs. When you’ve found the right plugin, click on the “Install Now” button next to it. WordPress will download and install the plugin on your site.
6. Activate the Plugin:
After installation, the “Install Now” button will change to an “Activate” button. Click on it to activate the plugin. Activating the plugin makes its features available for use on your site.
7. Configure Plugin Settings (if necessary):
Some plugins may require additional configuration. After activation, you may see a notice or a new menu item in your dashboard related to the installed plugin. Visit this section to configure settings based on your preferences.
8. Verify Successful Installation:
To ensure that the plugin is successfully installed and activated, you can check the Plugins section in your dashboard. The newly installed plugin should appear in the list, indicating that it’s ready for use.
9. Install Plugins Manually (if needed):
In some cases, you might download a plugin from an external source. To install such a plugin, click on the “Upload Plugin” button on the Add New Plugins page. Choose the plugin file you downloaded, and WordPress will install it.
Congratulations! You’ve successfully installed a WordPress plugin. Keep in mind that too many plugins can impact your site’s performance, so choose wisely and only install the ones that add genuine value to your blog. Regularly update your plugins to ensure they work seamlessly with the latest version of WordPress and to benefit from any security patches or new features.
Create the Main Pages of Your Blog: About, Contact, Privacy Policy, Disclaimer
About Page
The ‘About’ page of your blog is a crucial element in establishing a connection with your audience and providing them with insights into who you are and what your blog represents. It’s an opportunity to share your story, mission, and personality. Here’s a step-by-step guide on how to create a compelling ‘About’ page that resonates with your readers.

1. Navigate to Your WordPress Dashboard:
Log in to your WordPress dashboard, the central hub for managing your blog. From the dashboard, locate and click on “Pages” in the left-hand menu.
2. Click on ‘Add New’ Page:
Once in the Pages section, click on the “Add New” button to create a new page specifically for your ‘About’ content.
3. Craft an Engaging Title:
Give your ‘About’ page a title that reflects its purpose. You can simply go with “About” or get creative with something like “Meet the Blogger” or “Our Story.”
4. Share Your Personal Story:
In the main content area, start by sharing your personal story. Discuss what inspired you to start the blog, your journey so far, and what readers can expect from your content. Make it relatable and genuine.
5. Introduce Yourself:
Introduce yourself to your readers. Share your name, background, and any relevant information that gives readers a sense of who you are. Don’t forget to mention your passion for the blog’s topic.
6. Highlight Your Blog’s Mission:
Clearly articulate the mission of your blog. What are your goals for your content? Define the purpose and goals of your blog to provide readers with a clear understanding of what sets your blog apart.
7. Showcase Your Expertise:
If applicable, showcase your expertise in the blog’s niche. Mention any qualifications, experiences, or unique perspectives that position you as a credible and knowledgeable voice in your field.
8. Include Engaging Visuals:
Enhance the visual appeal of your ‘About’ page by including images. Share pictures of yourself, your workspace, or anything relevant to your blog’s theme. Visual elements add a personal touch and make your ‘About’ page more inviting.
9. Encourage Reader Engagement:
Promote reader interaction by encouraging them to connect with you. Provide links to your social media profiles or a contact form. Let readers know that you appreciate their feedback and are open to collaborations or discussions.
10. Preview and Publish:
Before publishing, use the preview feature to see how your ‘About’ page will appear to readers. Check for any typos or formatting issues. Once satisfied, click the “Publish” button to make your ‘About’ page live on your blog.
11. Update Periodically:
Your ‘About’ page is not set in stone. As your blog evolves and you accumulate more experiences, update your ‘About’ page periodically to keep it current and reflective of your journey.
Remember, your ‘About’ page is an opportunity to connect on a personal level with your audience. Be authentic, share your passion, and let your personality shine through. A compelling ‘About’ page can play a significant role in building a loyal readership and fostering a sense of community around your blog.
Contact Page
A ‘Contact’ page is a vital component of your blog, providing a direct and accessible way for your audience to reach out to you. Whether for collaboration inquiries, feedback, or general communication, the ‘Contact’ page fosters engagement. Here’s a guide on how to create an effective ‘Contact’ page for your blog.

1. Access Your WordPress Dashboard:
Log in to your WordPress dashboard, the command center for managing your blog. From the dashboard, find and click on “Pages” in the left-hand menu.
2. Click on ‘Add New’ Page:
In the Pages section, click on the “Add New” button to create a new page specifically for your ‘Contact’ information.
3. Title Your Page:
Give your page a clear and concise title such as “Contact” or “Get in Touch.” This title should be easily recognizable so that visitors know they’ve landed on the right page.
4. Include Contact Form:
The primary element of your ‘Contact’ page is the contact form. You can easily add a contact form using plugins like Contact Form 7 or WPForms. These plugins allow you to create customized forms with fields for name, email, subject, and message. Embed the form into your ‘Contact’ page for seamless communication.
5. Provide Additional Contact Information:
While the contact form is essential, also include additional contact information for those who prefer alternative methods. This can include your email address, social media handles, or a physical address if applicable. Offering multiple contact options accommodates a diverse audience.
6. Set Expectations:
Inform visitors about your response time and set expectations for communication. Whether you respond within 24 hours or have specific days for handling inquiries, transparency in your response policy builds trust with your audience.
7. Consider a Call-to-Action:
Motivate visitors to act by incorporating a call-to-action (CTA). For example, you can invite them to share feedback, propose collaboration ideas, or ask questions. A well-crafted CTA motivates engagement.
8. Privacy Assurance:
Reassure visitors that their contact information is secure and won’t be shared without consent. This builds trust and makes users feel more comfortable reaching out.
9. Visual Elements:
Enhance your ‘Contact’ page with visual elements. This could include images related to your blog’s theme, icons for different contact methods, or a map if you have a physical location. Visuals contribute to a more engaging and aesthetically pleasing page.
10. Preview and Publish:
Before making your ‘Contact’ page live, use the preview feature to check its appearance. Ensure that the contact form is functional, and all the information is accurate. Once satisfied, click “Publish” to make the ‘Contact’ page accessible on your blog.
11. Test the Contact Form:
After publishing, test the contact form to ensure it works correctly. Send a test message to yourself and verify that you receive it promptly. This step ensures that visitors can successfully reach you through the provided contact methods.
By creating a well-structured ‘Contact’ page, you make it easy for your audience to connect with you, fostering a sense of accessibility and openness. Regularly check and update your contact information to maintain effective communication with your readership.
Privacy Policy Page
A ‘Privacy Policy’ page is a crucial aspect of your blog, demonstrating transparency and commitment to user privacy. This page outlines how you handle visitor data, ensuring compliance with privacy laws and building trust with your audience. Here’s a step-by-step guide on creating an effective ‘Privacy Policy’ page for your blog.
1. Access Your WordPress Dashboard:
Log in to your WordPress dashboard, the central control hub for managing your blog. From the dashboard, navigate to “Pages” in the left-hand menu.
2. Click on ‘Add New’ Page:
Within the Pages section, click on “Add New” to create a new page dedicated to your ‘Privacy Policy.’
3. Title Your Page:
Give your page a straightforward title like “Privacy Policy.” Clarity is key so that visitors easily recognize the purpose of the page.
4. Content Structure:
Organize your ‘Privacy Policy’ content into clear sections. Begin with an introduction explaining the purpose of the policy, followed by specific details about the types of data collected, how it’s used, and any third parties involved.
5. Information Covered:
Include information about the types of data collected, such as personal information, cookies, or analytics data. Specify the purpose for collecting this data, whether for analytics, communication, or other legitimate reasons.
6. Data Handling Practices:
Outline how you handle user data, including storage, processing, and protection measures. Mention any third-party services or plugins that may collect data on your behalf.
7. Cookie Usage:
If your blog uses cookies, disclose this information. Explain the purpose of cookies, whether for improving user experience, analytics, or other functionalities. Include details on how users can manage or disable cookies.
8. User Rights:
Inform users about their rights regarding their data. This may include the right to access, correct, or delete their information. Provide contact details for users to exercise these rights.
9. Third-Party Links:
If your blog includes links to third-party websites, clarify that your privacy policy doesn’t apply to those sites. Advise users to review the privacy policies of external websites they visit through your blog.
10. Compliance with Laws:
Express your commitment to complying with privacy laws and regulations. This adds credibility to your privacy policy and assures users that you prioritize their data protection.
11. Include a Last Updated Date:
To demonstrate that your ‘Privacy Policy’ is current, include a “Last Updated” date. Regularly review and update the policy as your blog evolves or if there are changes in data handling practices.
12. Preview and Publish:
Before making your ‘Privacy Policy’ page public, use the preview feature to ensure it looks as intended. Double-check that all information is accurate and reflects your blog’s data handling practices. Once satisfied, click “Publish” to make the ‘Privacy Policy’ accessible to visitors.
13. Link in Footer or Navigation:
For easy access, consider adding a link to your ‘Privacy Policy’ page in the footer or main navigation menu of your blog. This ensures that users can locate it easily, demonstrating your commitment to transparency.
By crafting a comprehensive ‘Privacy Policy’ page, you not only comply with legal requirements but also build trust with your audience. Visitors appreciate transparency regarding how their data is handled, contributing to a positive user experience on your blog.
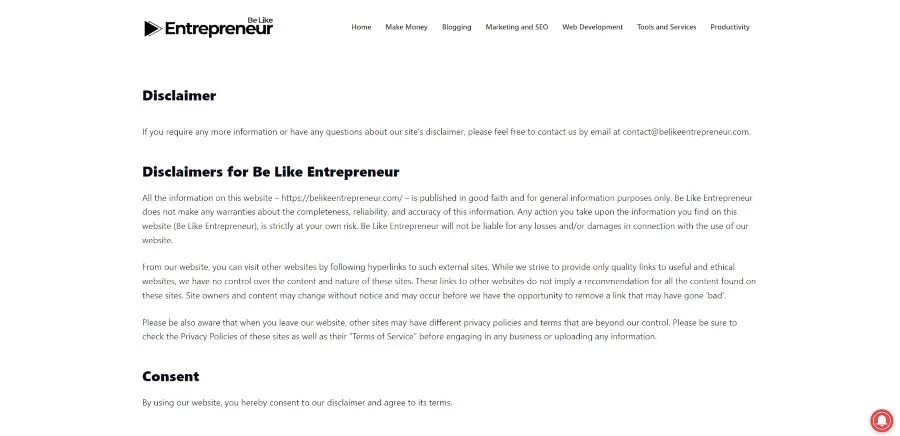
Disclaimer Page
A ‘Disclaimer‘ page is a crucial component of your blog, serving as a legal notice that clarifies the limitations and liabilities associated with your content. It helps manage reader expectations, discloses potential conflicts of interest, and outlines the purpose of your blog. Here’s a step-by-step guide on creating an effective ‘Disclaimer’ page for your blog.
1. Access Your WordPress Dashboard:
Log in to your WordPress dashboard, the central control hub for managing your blog. Navigate to “Pages” in the left hand side menu.
2. Click on ‘Add New’ Page:
Within the Pages section, click on “Add New” to create a new page specifically for your ‘Disclaimer.’
3. Title Your Page:
Give your page a clear title such as “Disclaimer.” This title should unmistakably convey the purpose of the page to your visitors.
4. Clarify the Nature of Content:
Begin your ‘Disclaimer’ by clarifying the nature of your content. State that the information provided on your blog is for informational purposes only and does not constitute professional advice. Specify that readers should always seek professional advice relevant to their specific situation.
5. Potential Conflicts of Interest:
Disclose any potential conflicts of interest that might influence your content. If you receive compensation for endorsements, reviews, or other content, it’s essential to inform your audience to maintain transparency.
6. Limitation of Liability:
Clearly outline the limitations of liability associated with your blog. Explain that you, as the blogger, are not responsible for any errors, omissions, or inaccuracies in the information provided. Emphasize that readers use the information at their own risk.
7. No Guarantee of Accuracy:
Make it explicit that you do not guarantee the accuracy, completeness, or suitability of the information on your blog. Highlight that information may be subject to change, and it’s advisable for readers to verify details independently.
8. External Links Disclaimer:
If your blog includes links to external websites, clarify that you are not responsible for the content or practices of these external sites. Advise readers to review the privacy policies and terms of service of any linked websites.
9. Professional Advice Disclaimer:
Reiterate that the content on your blog does not substitute professional advice. Encourage readers to consult with relevant professionals or experts for advice tailored to their individual circumstances.
10. Include a Last Updated Date:
To indicate that your ‘Disclaimer’ is current, include a “Last Updated” date. Regularly review and update the disclaimer as needed to reflect any changes in your blog’s content or policies.
11. Preview and Publish:
Before making your ‘Disclaimer’ page public, use the preview feature to ensure it looks as intended. Verify that all information is accurate and aligns with your blog’s goals and content. Once satisfied, click “Publish” to make the ‘Disclaimer’ accessible to visitors.
12. Link in Footer or Navigation:
For easy access, consider adding a link to your ‘Disclaimer’ page in the footer or main navigation menu of your blog. This ensures that users can find it easily, promoting transparency and legal compliance.
By incorporating a well-crafted ‘Disclaimer’ page, you set clear expectations for your audience and establish transparency regarding the nature and limitations of your blog’s content. This legal notice protects both you and your readers, contributing to a trustworthy and informed online environment.
Business Opportunity for Your Blog
Identifying a business opportunity within your blog niche is a crucial step toward turning your passion into a sustainable venture. To gauge the potential for a business within your chosen niche, follow these steps:

1. Audience Size and Engagement:
Begin by assessing the size and engagement level of your target audience. A thriving blog niche usually has a substantial audience interested in the topics you cover. Use analytics tools to understand your current audience size, demographics, and the level of interaction with your content.
2. Trend Analysis:
Investigate trends related to your blog niche. A niche that is consistently gaining popularity or experiencing periodic surges in interest may present lucrative business opportunities. Stay informed about industry trends, emerging topics, and changes in audience preferences.
3. Competitor Analysis:
Study your competitors within the niche. Analyze successful blogs or businesses in your field to understand their strategies, offerings, and areas where you can differentiate yourself. Identify gaps or areas where you can provide unique value to your audience.
4. Monetization Strategies:
Explore potential monetization strategies for your blog niche. This could include advertising, sponsored content, affiliate marketing, product sales, or offering services. Assess the feasibility of these strategies based on your audience and the nature of your niche.
5. Audience Needs and Pain Points:
Understand the needs and pain points of your audience within the niche. A successful business often addresses specific challenges or fulfills unmet needs. Conduct surveys, engage with your audience through comments, and gather feedback to identify areas where you can provide valuable solutions.
6. Industry Partnerships:
Evaluate the potential for partnerships within your niche. Collaborating with other businesses or influencers in your field can open up new opportunities, expand your reach, and enhance your credibility. Discover potential partners that resonate with your brand and values.
7. Keyword Research:
Perform comprehensive keyword research to comprehend the search patterns of your intended audience. Identify high-volume and relevant keywords related to your niche. This not only helps in optimizing your content but also provides insights into the topics that resonate with your audience.
8. Test and Iterate:
Experiment with different business ideas or monetization strategies on a smaller scale before fully committing. Test the waters with pilot projects, new content formats, or limited-time offerings to gauge audience response. Utilize the feedback to improve and fine-tune your approach.
9. Long-Term Viability:
Consider the long-term viability of your blog niche. A sustainable business opportunity should have the potential for growth and adaptability over time. Evaluate whether the niche is likely to remain relevant and interesting to your audience in the foreseeable future.
10. Industry Events and Conferences:
Attend industry events & conferences related to your niche. Networking with professionals in the field, staying updated on industry discussions, and learning from successful businesses can provide valuable insights into the overall health of your niche.
11. Diversification Opportunities:
Explore opportunities for diversification within your niche. This could involve expanding into related topics, launching complementary products or services, or catering to different segments of your audience. Diversification adds resilience to your business.
By thoroughly assessing these factors, you can gain a clearer understanding of the business potential within your blog niche. Remember that continuous adaptation and a deep understanding of your audience are key elements in identifying and seizing lucrative business opportunities.
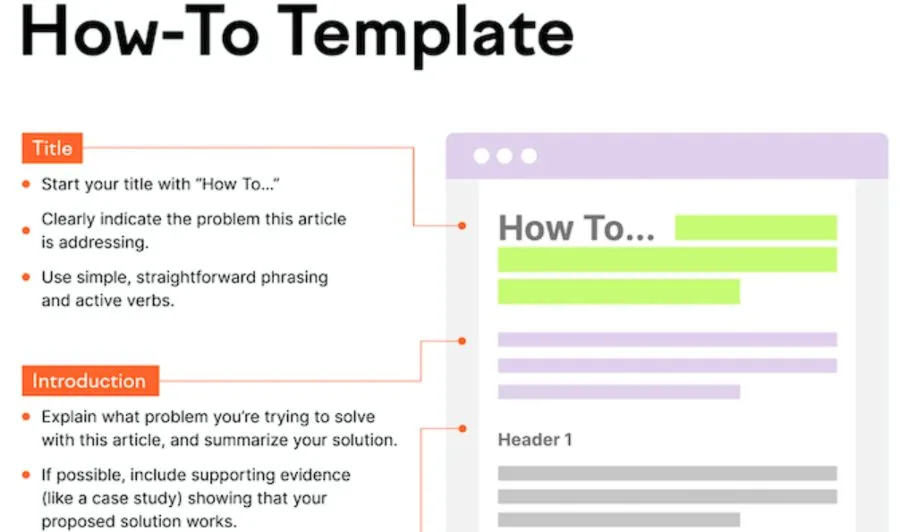
How to Write Your First Blog Post
Brainstorm Smart Blog Post Ideas Using Keyword Research & AI Tools
Certainly! Generating smart blog post ideas involves tapping into your creativity, addressing your audience’s interests, and staying relevant. Here are some brainstormed blog post ideas across different niches:
Niche-Specific Tutorials:
Create step-by-step tutorials relevant to your niche. For example, “Mastering Advanced Photo Editing Techniques” for a photography blog or “Ultimate Guide to Effective Content Marketing” for a marketing blog.

Interview Influencers:
Interview influencers or experts within your industry. Share insights, tips, and personal experiences. This can add authority to your blog and provide valuable content for your readers.
Behind-the-Scenes:
Offer a glimpse behind the scenes of your blog or business. Showcase the process of creating content, managing projects, or the day-to-day operations. Transparency fosters a connection with your audience.
Myth-Busting:
Address common myths or misconceptions in your niche. Write a post debunking these myths and providing accurate information. This not only imparts knowledge but also captivates your audience.
Resource Roundup:
Compile a list of valuable resources such as tools, books, or websites related to your niche. This can be a go-to guide for your audience and establish your blog as a helpful resource.
Seasonal Content:
Create content tailored to specific seasons or holidays. For example, “Summer Fitness Tips” or “Holiday Gift Guide for Tech Enthusiasts.” Seasonal content adds variety and keeps your blog current.
Case Studies:
Share real-life case studies related to your niche. Describe challenges, strategies implemented, and the outcomes. Case studies provide practical insights and are often appreciated by readers.
Predictions and Trends:
Write a post predicting future trends in your industry. Offer insights into where your niche is headed and how your audience can stay ahead. Trends posts showcase your industry knowledge.
Guest Posts:
Invite guest bloggers to contribute to your site. This not only introduces fresh perspectives but also expands your network. Consider experts or influencers in your niche for guest contributions.
Challenges and Solutions:
Identify common challenges your audience faces and provide practical solutions. This could be “Overcoming Writer’s Block” for a writing blog or “Effective Time Management for Entrepreneurs.”
Book or Product Reviews:
Review relevant books, tools, or products in your niche. Share your honest opinions and provide recommendations. This helps your audience make informed decisions.
Infographics and Visual Content:
Create visually appealing content such as infographics, charts, or diagrams to convey complex information. Visual content is shareable and attracts attention.
Interactive Content:
Develop quizzes, surveys, or polls related to your niche. Encourage audience participation and share the results in a follow-up post. Interactivity boosts engagement.
Personal Stories or Journeys:
Share personal stories or experiences related to your niche. This might take the form of a post about “My Entrepreneurial Journey” or “Discoveries from Solo Travel.”
Roundup of Industry Events:
Attend industry events or conferences and provide a roundup of key takeaways, interesting discussions, and new developments. This keeps your audience informed about industry happenings.
Remember to tailor these ideas to your specific niche and audience preferences. The key is to create content that resonates with your readers and adds value to their lives.
Write Your First Blog Post
Congratulations on taking the exciting step of launching your blog! Now that you’re ready to write your first blog post, let’s dive into creating content that captures your audience’s attention and sets the tone for your blog’s journey.
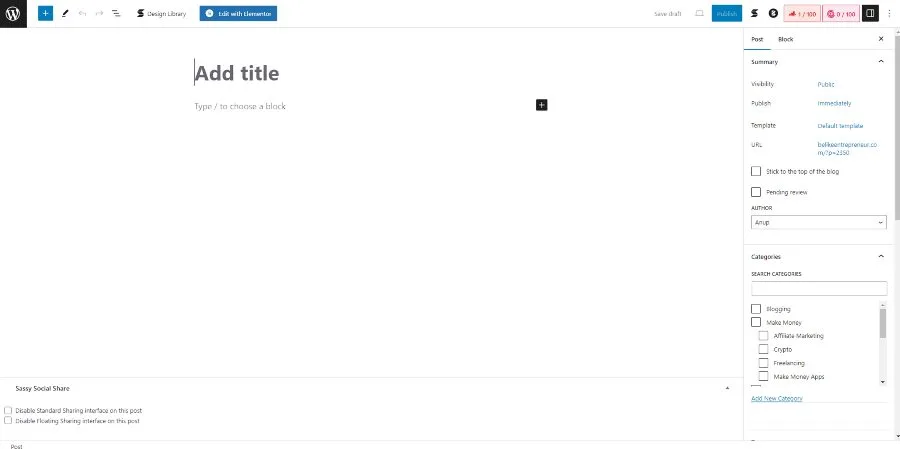
1. Reflect on Your Blog’s Purpose:
Begin by revisiting the purpose of your blog. What inspired you to start this journey? Whether it’s sharing personal experiences, providing valuable information, or showcasing your expertise, understanding your blog’s purpose will guide your writing.
2. Choose a Compelling Topic:
Select a topic that aligns with your blog’s theme and resonates with your target audience. Consider addressing a common question in your niche, sharing a personal story, or providing valuable insights. Your first post should be engaging and relevant.
3. Craft an Intriguing Headline:
Craft a compelling headline as it is the initial thing readers encounter. Spark interest by crafting a headline that entices curiosity. As an illustration, consider “Revealing the Secrets: My Journey to [Your Blog’s Niche]” or “A Comprehensive Guide to [Key Topic] Every Beginner Should Grasp.”
4. Create a Captivating Introduction:
Capture your readers’ attention from the start with a captivating introduction. Share a brief overview of what your post will cover and why it matters. Think about commencing with a personal story or a question that stimulates reflection.
5. Structure Your Content:
Organize your content in a clear and reader-friendly structure. Utilize subheadings and brief paragraphs to break up the text. This makes your post visually appealing and easier to digest.
6. Infuse Your Unique Voice:
Let your personality shine through your writing. Infuse your unique voice, whether it’s friendly, informative, or conversational. Authenticity resonates with readers & establishes a connection.
7. Provide Value:
Ensure that your first blog post provides value to your readers. Whether it’s sharing tips, insights, or a fresh perspective, make your content informative and actionable. Aim to solve a problem or address a need within your niche.
8. Include Visuals:
Enhance your post with visuals such as images, infographics, or relevant media. Visual elements break up the text and make your content more engaging. Incorporate visuals that enhance and reinforce your message.
9. Call to Action (CTA):
Conclude your post with a straightforward call to action. Encourage readers to leave comments, share the post on social media, or explore other articles on your blog. A carefully constructed call-to-action (CTA) directs your audience on the next steps.
10. Edit and Proofread:
Before hitting the publish button, carefully edit and proofread your post. Check for grammatical errors, clarity & overall coherence. A polished post reflects professionalism and enhances the reader’s experience.
11. Be Ready for Feedback:
Embrace the opportunity for feedback from your readers. Encourage comments and engagement. Respond to comments graciously and use feedback to improve your future posts.
12. Preview and Publish:
Once you’ve crafted your post and ensured everything is in order, use the preview feature to see how it will appear to readers. When satisfied, take the exciting step of publishing your inaugural blog post for the world to see.
Remember, this first post is just the beginning of your blogging journey. Enjoy the process, stay true to your vision, and have confidence in the valuable content you’re bringing to your audience. Happy blogging!
Choose an SEO-Friendly Blog Post URL
Choosing an SEO-friendly blog post URL is a crucial step in optimizing your content for search engines and enhancing its visibility. To craft an effective URL, prioritize simplicity and clarity. Keep it short and concise, eliminating unnecessary words and symbols. Incorporate relevant keywords that mirror the main theme of your blog post, signaling to search engines what the content is about. A well-chosen keyword in the URL can significantly improve your post’s chances of appearing in relevant search results.
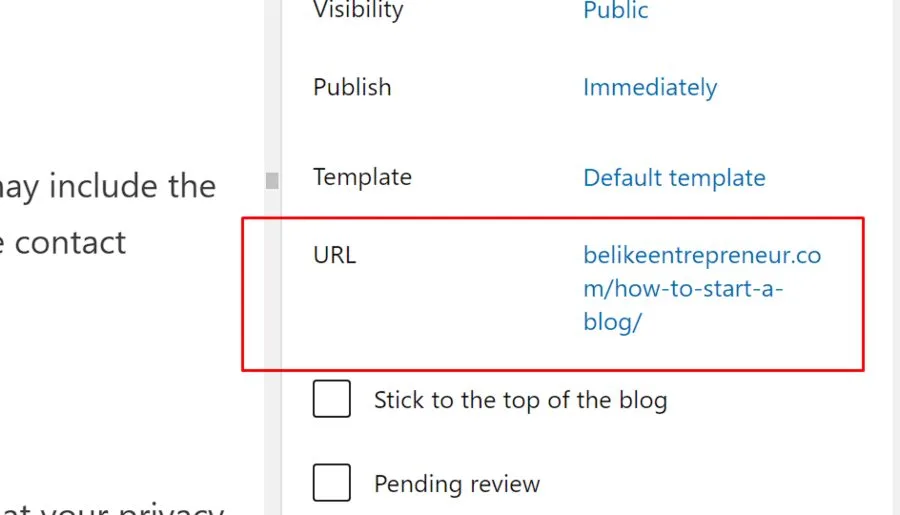
Additionally, use hyphens to separate words in the URL rather than underscores, as search engines interpret hyphens as spaces. This contributes to better readability and aids in SEO. Avoid special characters and symbols, and maintain consistency in your URL structure across different blog posts. Remember that a clear and coherent URL not only supports search engine optimization but also enhances the overall user experience, making it easier for visitors to understand and remember the content’s context. By implementing these practices, you’ll create SEO-friendly URLs that positively impact your blog’s discoverability and ranking in search engine results.
Optimise the Design and Layout of Your Blog Post
Make your blog posts readable
Ensuring readability is essential for engaging blog posts. To enhance this aspect, focus on concise and well-structured sentences that convey your ideas clearly. Break down content into digestible paragraphs and use subheadings to guide readers through different sections. Additionally, incorporate bullet points and numbered lists for easy comprehension. Choose a legible font and maintain a comfortable font size to facilitate smooth reading. Consider the overall visual appeal by adding relevant images or multimedia elements to complement your text. Striking a balance between informative content and a reader-friendly format not only captures attention but also encourages visitors to stay and explore your blog further.
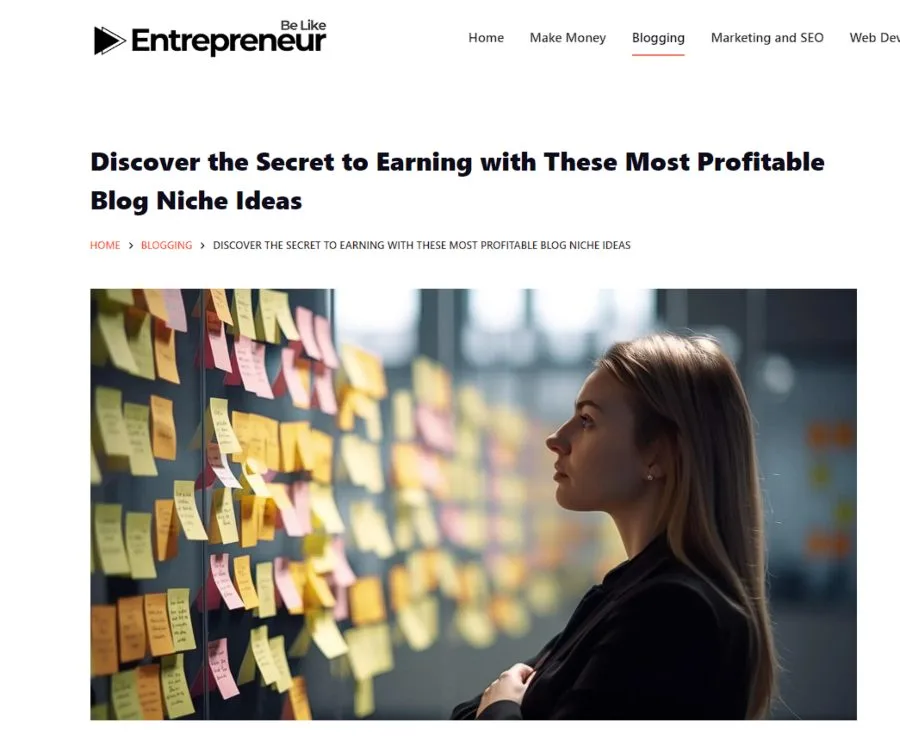
Include a relevant featured image for your blog post
Including a relevant featured image at the top of your blog post is a powerful strategy to captivate your audience and enhance the overall visual appeal. The featured image serves as a preview, offering a glimpse into the content and enticing readers to explore further. Choose an image that aligns with the topic and resonates with the emotions or themes you want to convey.
The featured image not only adds aesthetic value but also plays a role in social media sharing. When your blog post is shared on platforms like Facebook or Twitter, the featured image often accompanies the link, making it more eye-catching and shareable. Ensure that the image is high-quality, visually appealing, and relevant to create a positive first impression and encourage readers to delve into the content.
Use multiple subheaders
Incorporating frequent subheaders is a valuable technique to enhance the readability and organization of your blog post. Subheaders act as signposts, guiding readers through different sections of your content and allowing them to quickly identify key points. This strategy not only breaks up the text into manageable chunks but also facilitates easier navigation.
When crafting subheaders, be descriptive and use keywords relevant to the content beneath them. This not only aids in readability but also contributes to SEO by signaling the structure and focus of your post to search engines. By strategically incorporating subheaders, you create a more user-friendly reading experience, keeping your audience engaged and helping them extract the most value from your blog post.
Use styling elements to emphasize key points of your post
Utilizing styling elements to emphasize key parts of your blog post is a powerful way to draw attention to crucial information and enhance the overall visual appeal. Consider using bold or italicized text to highlight important phrases, keywords, or key takeaways. This not only aids readers in quickly identifying significant points but also adds a dynamic and visually engaging element to your content.
Additionally, incorporating bulleted or numbered lists can further emphasize and organize key information, making it more accessible to your audience. Striking a balance between the use of styling elements and maintaining a clean, uncluttered design ensures that your emphasis enhances readability without overwhelming the reader. By leveraging styling effectively, you not only guide your audience through the content but also create a visually pleasing and impactful blog post.
Make sure people know where they are
Ensuring that readers know where they are on your blog is crucial for providing a seamless and user-friendly experience. Begin by having a clear and recognizable blog logo or title at the top of your page. This establishes your brand and helps visitors identify your blog instantly.
Additionally, use consistent navigation menus and labels to guide users through different sections of your blog. Highlight the current page or section, making it visually distinct to convey to readers their location within your site. Breadcrumbs—a navigational aid that shows the hierarchical path to the current page—can also provide clarity and context.
By implementing these practices, you create a sense of orientation for your readers, enhancing their overall navigation experience and making it easier for them to explore and engage with your blog content.
Hit Publish on Your First Blog Post
Congratulations on reaching this pivotal moment in your blogging journey! It’s time to share your thoughts, experiences, or expertise with the world by hitting the publish button on your first blog post. As you embark on this exciting step, consider a few key aspects to ensure your post makes a memorable debut.
1. Double-Check Content:
Before hitting publish, meticulously review your content for any typos, grammatical errors, or formatting issues. A polished post reflects professionalism and makes a positive impression on your readers.
2. Optimize Meta Tags:
Optimize your meta title and description to make your post more search engine-friendly. Craft a compelling meta title that encapsulates your post’s essence, and write a concise description that encourages clicks from search engine results.
3. Add Relevant Tags and Categories:
Assign relevant tags and categories to your post to enhance its discoverability. This helps both readers and search engines understand the broader topics your blog covers.
4. Share on Social Media:
Amplify your post’s reach by sharing it on your social media platforms. Craft engaging captions, use relevant hashtags, and encourage your followers to explore your new content.

5. Engage with Your Audience:
As readers discover your post, actively engage with their comments and feedback. Foster a sense of community by responding to questions, expressing gratitude for positive feedback, and valuing constructive criticism.
6. Monitor Analytics:
Keep an eye on your blog analytics to understand how your audience interacts with your first post. Analyzing metrics such as page views, time spent on the page, and user demographics provides insights for refining your future content strategy.
7. Celebrate the Milestone:
Hitting publish on your first blog post is a significant milestone. Take a moment to celebrate your accomplishment, recognizing the dedication and creativity you’ve invested in bringing your ideas to the digital realm.
Remember, this is just the beginning of your blogging adventure. Each post contributes to the narrative of your blog, and as you continue to share your insights and experiences, your audience will grow. Embrace the journey, stay authentic, and enjoy the process of watching your blog evolve. Happy publishing!
Free Blog Photo Resources
Enhancing your blog with captivating visuals is a powerful way to engage your audience. Luckily, there are numerous free resources where you can find high-quality, royalty-free images to elevate the visual appeal of your content. Here are some go-to platforms for sourcing free blog photos:
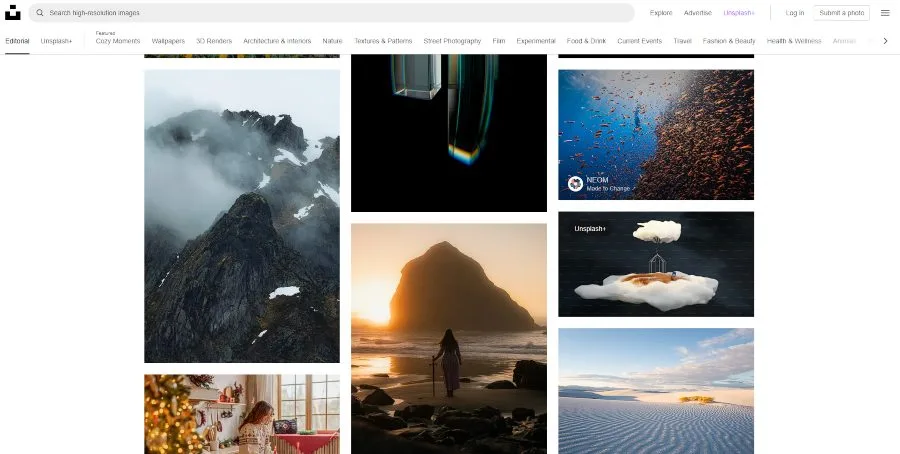
1. Unsplash:
Unsplash offers a vast collection of high-resolution images contributed by photographers from around the world. The images are free to use for both personal and commercial purposes, making it a fantastic resource for bloggers seeking visually stunning content.
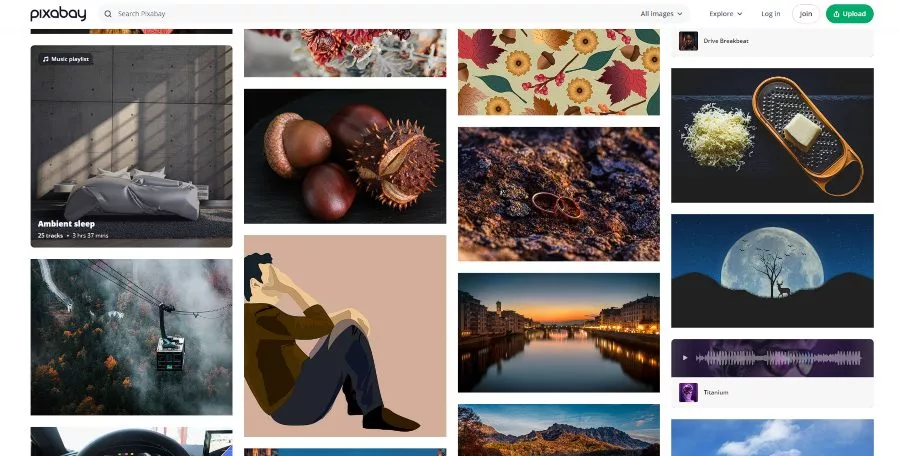
2. Pixabay:
Pixabay provides a diverse range of images, illustrations, and vector graphics. All content is released under the Creative Commons CC0 license, ensuring that you can use the images without worrying about copyright restrictions.
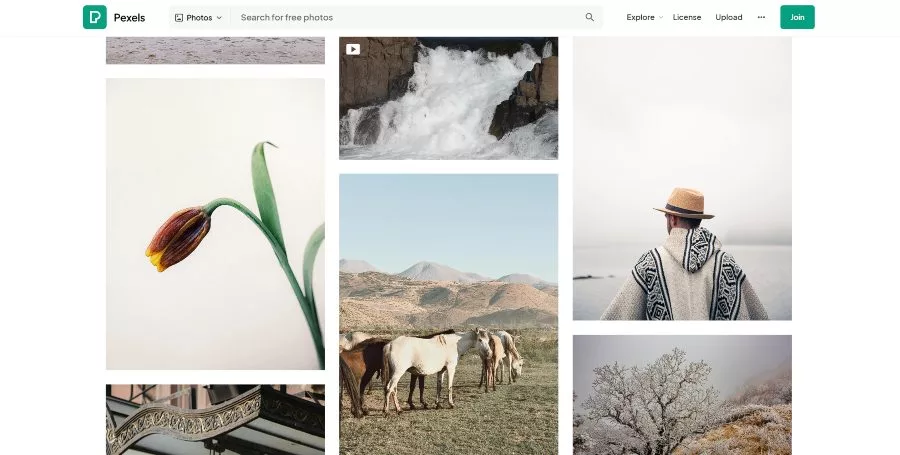
3. Pexels:
Pexels is another excellent resource for high-quality, free stock photos. The platform aggregates content from various sources and allows users to download and use the images for free, even for commercial purposes.
4. Freepik:
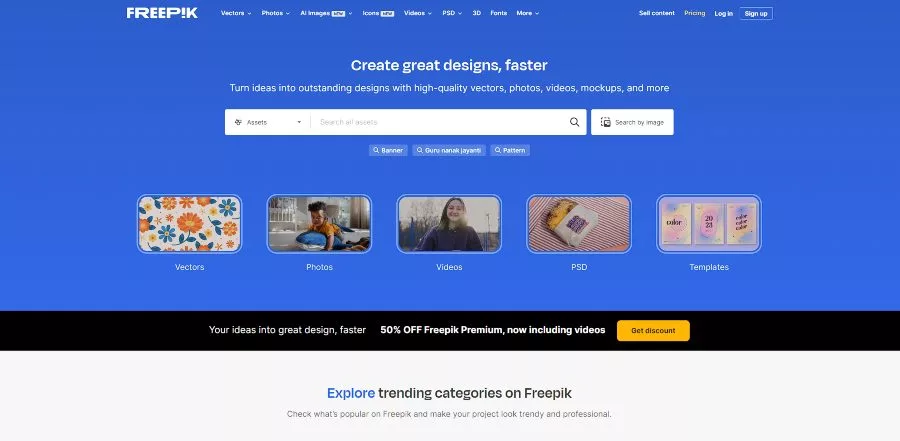
Freepik specializes in offering free vectors, photos, illustrations, and PSD files. While some content may require attribution, Freepik provides a wealth of visually appealing resources for bloggers looking to enhance their posts.
5. Burst by Shopify:
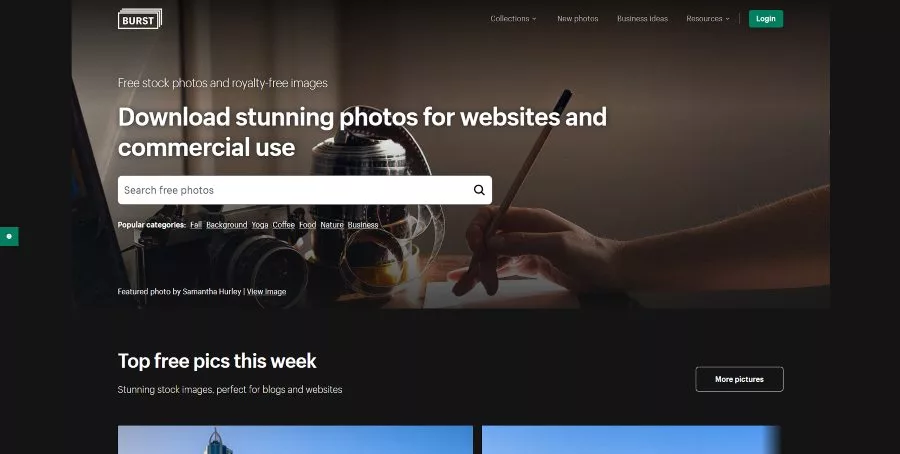
Burst is a stock photo platform that was developed by Shopify and is available for free. It provides high-resolution images that are ideal for e-commerce and business-related blog content. The images can be used freely without the need for attribution.
6. Reshot:
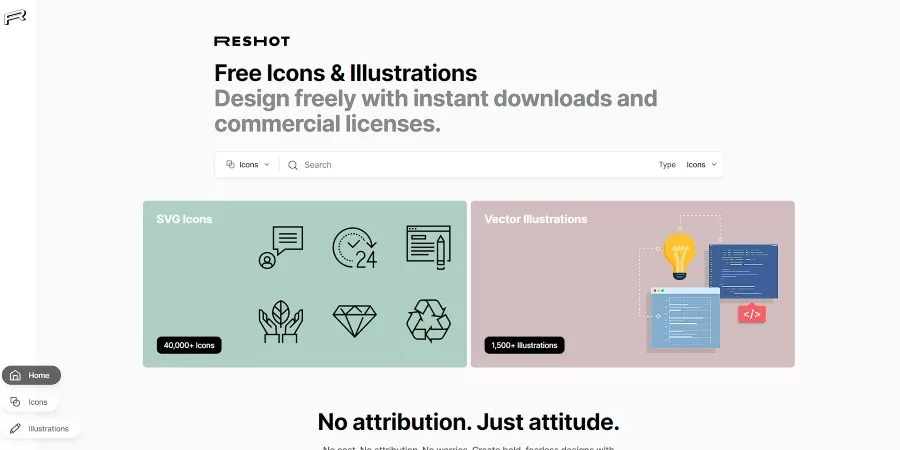
Reshot is a community-driven platform that curates handpicked, non-stocky images. It focuses on providing unique and authentic photos for creatives and bloggers seeking distinctive visuals for their content.
7. SplitShire:
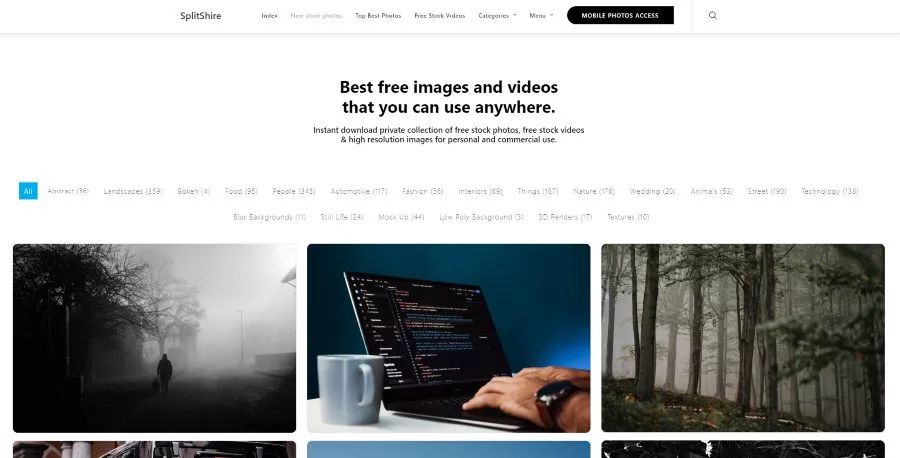
SplitShire offers a collection of high-quality, royalty-free images covering a wide range of themes. The platform is known for its artistic and visually appealing photographs that can add a touch of creativity to your blog.
8. PicJumbo:
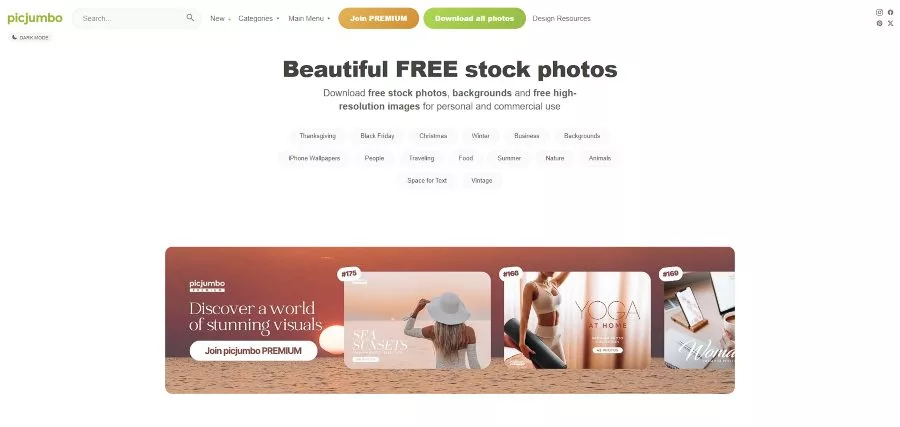
PicJumbo is a compilation of photos available for both commercial and personal use at no cost. It provides a variety of high-resolution images in different categories, making it easy to find the perfect visuals for your blog posts.
Before using any images, it’s essential to check the licensing terms on each platform to ensure compliance with their usage policies. With these resources at your fingertips, you can effortlessly enhance the visual aesthetics of your blog without compromising on quality or breaking the bank. Happy blogging!
Promote Your Blog
Promoting your blog is a crucial step in reaching a wider audience and building a loyal readership. In the vast landscape of the internet, strategic promotion ensures that your valuable content doesn’t go unnoticed. Here’s a comprehensive guide to effectively promote your blog and maximize its impact:
1. Craft Compelling Content:
The foundation of successful blog promotion lies in creating compelling and valuable content. Before diving into promotional strategies, ensure that your blog posts are well-written, informative, and resonate with your target audience. Quality content forms the backbone of any successful promotion.
2. Harness the Power of Social Media:
Social media platforms are dynamic hubs for connecting with potential readers. Share snippets, images, and engaging content from your blog across platforms like Facebook, Instagram, Twitter, and LinkedIn. Engage with your audience, respond to comments, and leverage hashtags to increase visibility.

3. Build an Email Subscriber List:
Cultivate a direct connection with your audience by building an email subscriber list. Encourage visitors to subscribe to your blog for regular updates. Email newsletters provide a personalized avenue to share new content, promotions, and connect with your readers on a deeper level.
4. Collaborate with Other Bloggers:
Explore collaboration opportunities with fellow bloggers in your niche. Guest posting, co-hosted events, or joint projects can introduce your blog to new audiences. Building relationships within your blogging community opens doors to mutually beneficial promotional endeavors.
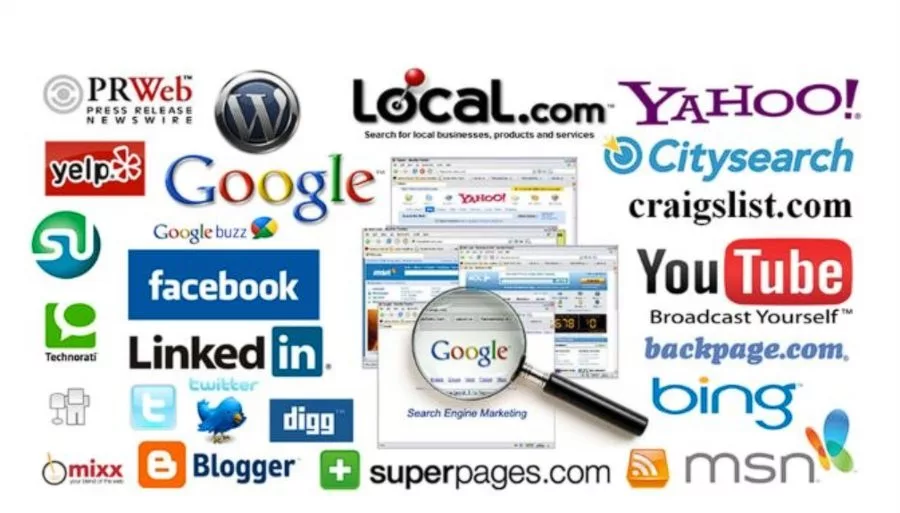
5. Optimize for Search Engines (SEO):
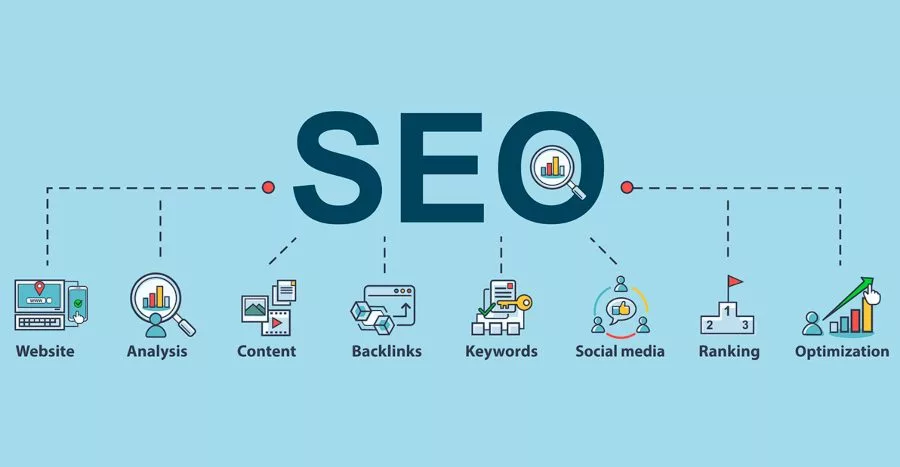
Implement search engine optimization (SEO) strategies to enhance your blog’s visibility on search engines. Research relevant keywords, optimize meta tags, and create quality backlinks. A well-optimized blog is more likely to appear in search engine results, driving organic traffic.
6. Participate in Online Communities:
Joining relevant online communities and forums allows you to engage with individuals interested in your blog’s niche. Share your expertise, answer questions & subtly promote your blog when appropriate. Being an active member of communities establishes your authority and attracts readers.
7. Utilize Paid Advertising:
Consider using paid advertising to amplify your blog’s reach. Platforms like Google Ads or social media advertising allow you to target specific demographics and reach a broader audience. Allocate a budget for paid promotions based on your blog’s goals and growth strategy.
8. Leverage Visual Platforms:
Images and graphics has a powerful impact on audience engagement. Utilize platforms like Pinterest and Instagram, known for their visual appeal. Create visually striking images and infographics related to your blog content, linking back to your posts for increased traffic.
9. Network Offline:
Don’t underestimate the power of offline networking. Attend industry events, conferences, or local meetups to connect with potential readers and fellow bloggers. Networking offline can lead to valuable partnerships and word-of-mouth promotion.
10. Monitor Analytics and Adapt:
Regularly analyze the performance of your promotional strategies through analytics. Track website traffic, social media engagement & also conversion rates. Use these insights to adapt your promotion tactics, focusing on what resonates most with your audience.
By combining these diverse promotion strategies, you create a holistic approach to increase your blog’s visibility and attract a dedicated readership. Remember, consistency is key, and the more varied your promotional efforts, the greater the chances of reaching new audiences and making your blog a resounding success. Happy promoting!
Make Money from Your Blog
Turning your blog into a source of income is an exciting prospect that requires a thoughtful approach. Here’s a comprehensive guide on various strategies to effectively make money from your blog:
1. Explore Advertising Opportunities:
Utilize advertising as a revenue stream by incorporating display ads, sponsored content, or affiliate marketing. Partnering with relevant brands or affiliates can generate income based on clicks, impressions, or successful referrals.
2. Implement Affiliate Marketing:
Affiliate marketing involves promoting other companies’ products and earning a commission for each sale or click generated through your unique affiliate link. Choose products aligned with your blog’s niche to enhance relevance and trust with your audience.
3. Offer Sponsored Content:
Collaborate with big brands & businesses of your niche to create sponsored content. This involves writing posts, creating videos, or featuring products/services in exchange for compensation. Ensure that sponsored content aligns with your blog’s values & interests.
4. Launch an Online Store:

If you create unique products or merchandise related to your blog niche, consider launching an online store. Selling merchandise, e-books, or exclusive content can provide a direct source of income while enhancing your brand.
5. Provide Online Courses or Workshops:
Utilize your knowledge and skills by providing online courses or workshops. Platforms like Udemy or Teachable allow you to create and sell courses directly to your audience. Share valuable insights, tutorials, or skills related to your blog’s niche.
6. Establish a Membership Program:
Create a membership program where readers pay a subscription fee for exclusive access to premium content, resources, or a community forum. This recurring revenue model can provide a stable income stream while fostering a dedicated community.
7. Host Webinars or Virtual Events:
Engage with your audience by hosting webinars or virtual events. Charge a registration fee or collaborate with sponsors to monetize these events. Webinars provide a platform to share knowledge, connect with your audience, and generate income.
8. Offer Freelance Services:

Showcase your expertise by offering freelance services related to your blog niche. This could include consulting, writing, graphic design, or any skills you possess. Advertise your services on your blog and leverage your platform to attract clients.
9. Utilize Crowdfunding:
Platforms like Patreon or Kickstarter allow your audience to support your blog financially. Offer exclusive perks, behind-the-scenes content, or early access to incentivize your readers to become patrons and contribute to your blog’s sustainability.
10. Optimize for SEO and Monetization:
Enhance your blog’s visibility through search engine optimization (SEO) to attract more traffic. Increased traffic can contribute to higher ad revenue, affiliate marketing earnings, and overall monetization opportunities.
Remember, successful blog monetization often involves a combination of these strategies. Tailor your approach based on your blog’s niche, audience, and the value you provide. Continuously assess and adapt your monetization strategies to align with your blog’s growth and evolving goals. Happy blogging and monetizing!
FAQs
Q1: How do I start a blog from scratch?
A: To start a blog from scratch, choose a niche that aligns with your interests and expertise. Select a reliable blogging platform, register a domain name, and set up hosting. Customize the design, create valuable content, and gradually build your online presence.
Q2: What is the importance of choosing the right niche?
A: Choosing the right niche is crucial as it determines your target audience and content focus. Opt for a niche that reflects your passion and has an audience interested in the topics you plan to cover. This ensures sustained interest and engagement from your readers.
Q3: How can I make my blog visually appealing?
A: Make your blog visually appealing by selecting a clean and user-friendly design. Incorporate high-quality images, use consistent branding elements, and organize content with headers and subheadings. Visual appeal enhances the overall user experience and encourages visitors to explore your blog.
Q4: What are the key steps in creating engaging blog content?
A: Creating engaging blog content involves understanding your audience, conducting thorough research, and crafting well-written, informative articles. Use compelling headlines, break content into digestible sections, and incorporate visuals to enhance readability and engagement.
A: Effectively promote your blog on social media by identifying your target audience, choosing the right platforms, and sharing a mix of blog content, visuals, and curated material. Engage with your audience, use relevant hashtags, and maintain a consistent posting schedule.
Q6: What are some monetization strategies for new bloggers?
A: New bloggers can explore monetization through methods like affiliate marketing, sponsored content, display ads, and selling products or services. It’s essential to balance monetization with providing value to your audience to maintain trust and engagement.
Q7: How often should I publish new blog posts?
A: The frequency of publishing new blog posts depends on your schedule and the quality of content you can consistently produce. It’s better to focus on quality over quantity. Set a realistic publishing schedule that allows you to maintain consistency without compromising content quality.
Q8: What tools are essential for new bloggers?
A: Essential tools for new bloggers include a reliable content management system (CMS), graphic design tools, social media scheduling platforms, and analytics tools. These tools help streamline blog management, content creation, and performance tracking.
Q9: How can I stay motivated as a new blogger?
A: Stay motivated as a new blogger by setting realistic goals, celebrating small achievements, and connecting with other bloggers for support. Focus on your passion for your blog’s niche, and regularly reassess and adjust your goals to keep the journey fulfilling.
Q10: How long does it take to see results as a new blogger?
A: The time to see results as a new blogger varies, but patience is key. It might take several months to see significant traffic and engagement. Consistent effort, quality content, and strategic promotion contribute to long-term success in the blogging world.
You May Also Like:
Discover the Secret to Earning with These Most Profitable Blog Niche Ideas
Creating a WordPress Site A Comprehensive Guide
Top 25 Freelance Job Websites for Remote Work
18 On-Page SEO Techniques To Rank On First Page
Top 20 Money Making Apps You Can’t Miss
24 Best Free SEO Tools for Your Website